...there was blue-gray, white, and lots of peeling paint. There were big drafty windows and no place to hang your coat...
The big drafty windows were some of the first exterior projects we decided to tackle. It stared with just a few, but to date there only remains 1 window that was original to our house at the time we bought. It just happens to be the most obnoxious one, a huge picture window front and center.
[Technically, even this window has been replaced, we did update the glass to an insulated double-pane with Low-E coating... but, we didn't have to alter any framing to get there!]
Altogether we've installed 15 wood window units. We chose
Kolbe-Kolbe wood double-hung units with aluminum cladding exterior.

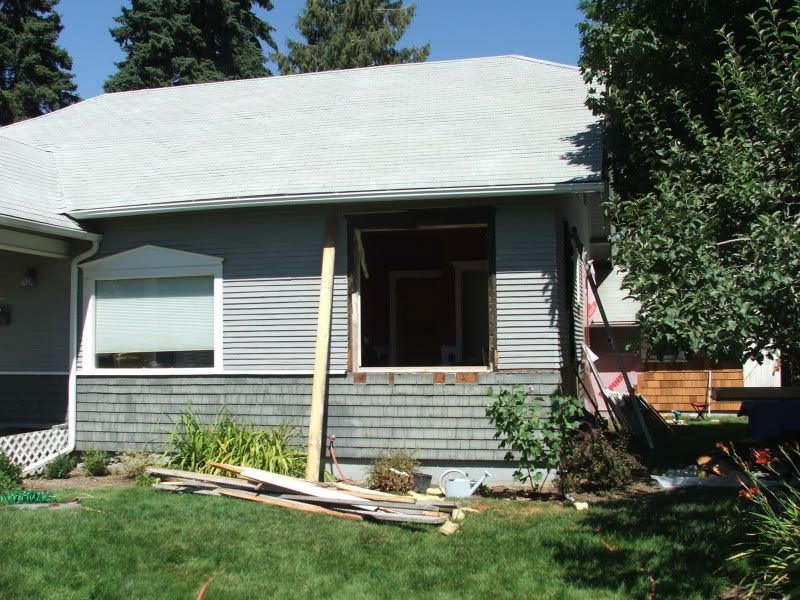
This hole was our first attempt at exterior finish work. Did you know that a permit is required in our town to install new windows? We learned quickly with a pretty red tag hanging on our door.
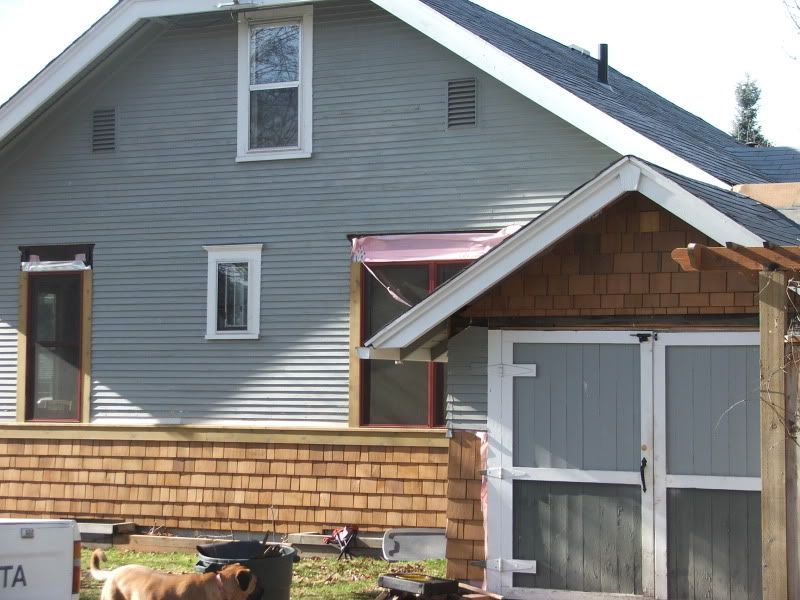
Around the same time, and after growing a strong distaste for the columns on our front porch, we dove into a front porch/entry remodel. We dreamed of a quintessential Arts & Crafts look with wood columns and beams and beautiful
iron-work. The house was also lacking a
formal entry which meant that any guests or door-to-door salesmen had access straight into our living room. To remedy the feeling of over-exposure, we confiscated some of the front porch exterior space and turned it into an interior foyer.
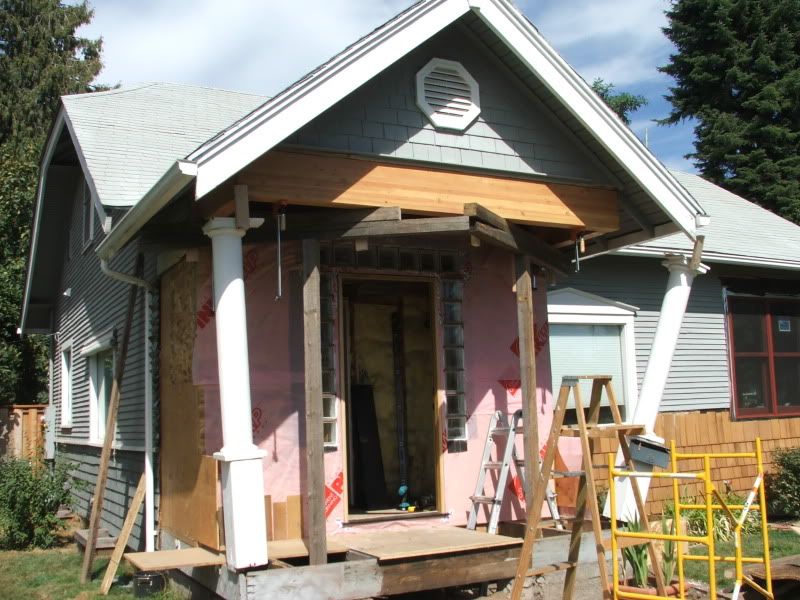
This photo is funny to me in some way. That dangling column looks pretty foreboding. Fortunately, nothing fell but the columns themselves (and in their own due time). Drive by in the summer and we'll likely be sitting on our front porch. I promise we'll wave.

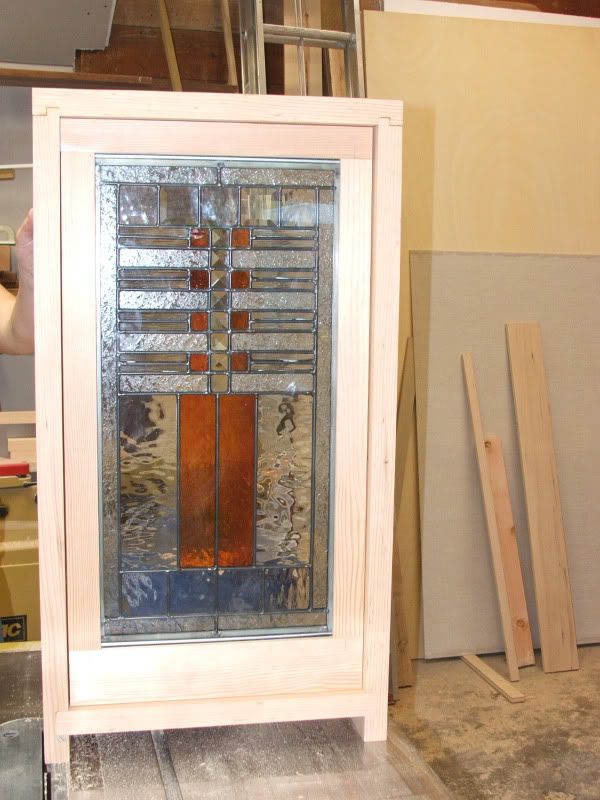
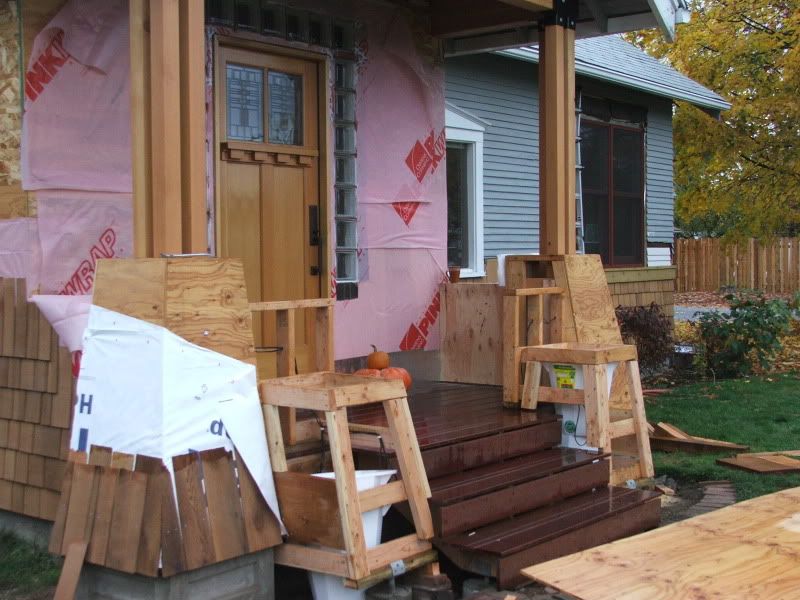
One of John's many detailed details, here is more progression of the front porch remodel. The front door is by
Simpson and features a stained glass design by Frank Lloyd Wright, who happens to be John's favorite architect. The decking on the porch is Brazilian redwood. The two boxes adjacent to the steps are planters.
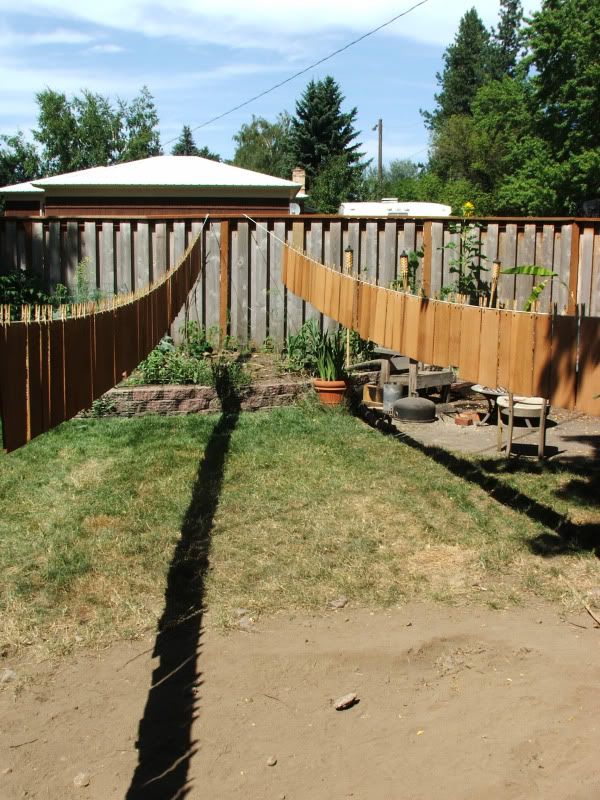
As you may have already noticed, we opted to get rid of the painted shingles and replace them with stained shingles. So, one may wonder, what is the proper way to stain and prep shingles for installation? We still aren't certain, but for an entire summer we had various rows of cedar shingles hanging in our backyard, drying on the line.

Once they finally dried, the shingles were installed. For what its worth, it wasn't a terrible experience to hang them all. I think I can claim to have done a majority of the installation. All it really takes is an upturned 5 gallon bucket to sit on, then lots of repetitive tinking with the hammer to tack them in place.
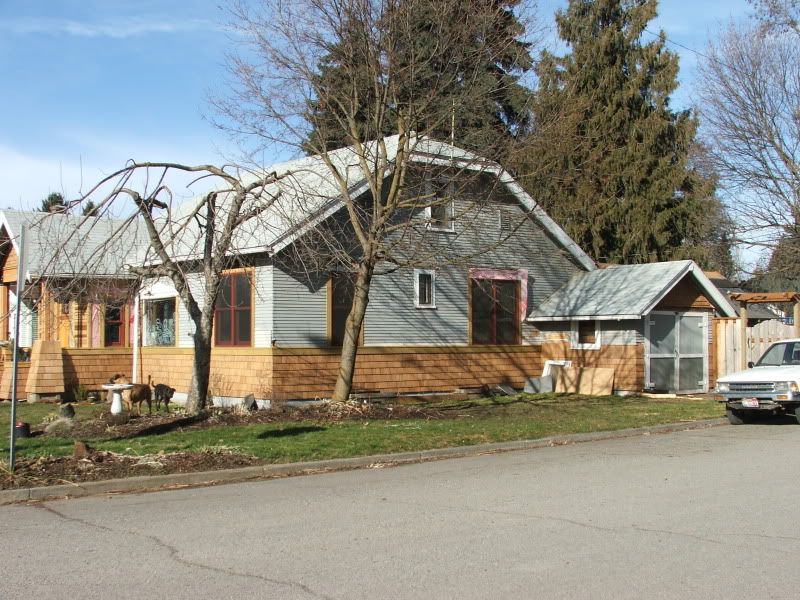
And there you have it! A halvesies house.

I'm sure the neighborhood thought we had pretty terrible taste. And knowing us, this stayed looking this way for many moons. I think this project started in 2004 or 2005. FYI, it still isn't completely done.
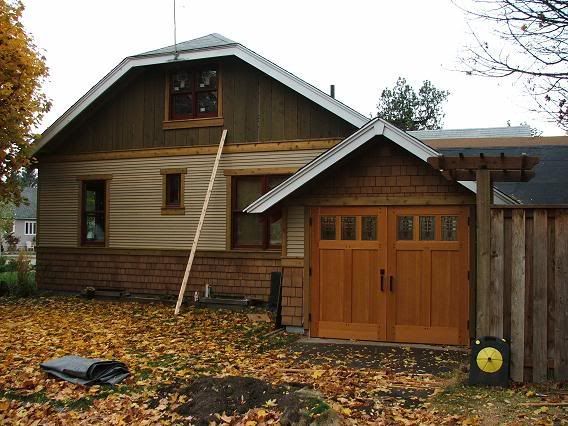
Here is a shot for before and after comparison... this is actually mid-early more than its before, but you get the general drift. Things to note: garage doors and small window with white trim, oh and the mostly black face of Simon!
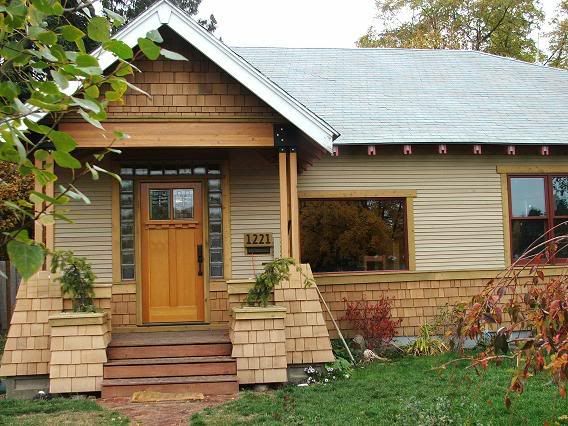
Now check this out! Seeing these differences make me glad that we started this project. It's really easy to forget how much you gain when you do-it-yourself with all of the stress and road-blocks that seem to be constantly taking the starring role.
This isn't the end of it by any means, and is in fact, just a teaser. We'll be back again with focus on one of the many other evolutions this place has seen... there have been more than a few!