Wednesday, October 26, 2011

You say 'Foyer', I say 'Front Door'.

Okay, that's not true, sometimes I say Foyer too.

I'm not really sure how to best create posts in any order for these projects. We've already done some bouncing around... I suppose it might now be a good opportunity to step back to the front steps. Cha cha cha.

When we moved into the house, it had a flat front with a porch plugged on around the front door. It was actually a nice porch, really big (8' x 11' I think) with wide steps great for lots of people to sit on during lazy summer evenings.

The disadvantage of moving into a small house is that it isn't easy to recover small spaces for use as small spaces. The front door opened straight into the living room and had a big glass window that stared right at the kitchen. This gave us little privacy... plus we didn't have much for a coat closet either.

We came to the realization that the front porch was the answer to our front door woes. We confiscated 4' from its depth, walled it in, and called it our Foyer.

I really love this tiny room, mainly because it introduces anyone who walks in our front door to our craftsman style and really helps us to define our intention of achieving a craftsman home with a modern twist.

John installed some amazingly beautiful VG Fir Wainscoting complete with a 1/2 wall that has a column to the ceiling... creating a sweet little ledge and opening to the living room.

We also wanted to ensure that we allowed a lot of light into the house, but still retained some element of privacy. To accomplish this, we framed the front door with a glass-block boarder. I like the glowing affect it produces when you approach our house in the evening and the Foyer light happens to be turned on.

We installed in-floor heating mats under the slate tile. We decided to do this because, as a former exterior porch, the room wasn't tied into the rest of the house's heating system. I now wish that we had used this product in other areas of the house (eh-hem, the bathroom), because it is so wonderfully toasty warm to stand on.

Tuesday, October 25, 2011

Inside Every Craftsman is a Workshop

It didn't take us long to realize that our "garage" would, in fact, never fulfill its purpose as a "garage".

meow...
When we moved in, our sole transportation was a charismatic VW Golf GTI (which John had turned sleeper with a new turbo engine... it was pretty awesome, but that is for another day...). If you are not familiar with rides of a similar persuasion, I can assure you that it is not a car of stature, unlike many more commonly popular vehicles in northern Idaho.

If I remember correctly, the overall
width wall to wall is just over 10'.
We did our best to make use of our new garage and small car combo, but it just wasn't meant to be. It wasn't possible to park the car in the garage AND open both doors WHILE allowing passengers to maneuver through the space.

However, we did quickly realize that we needed a staging area for our new construction projects. It also became evident that John had a knack for picking up crafting trades and needed space for crafting creation. So came the decree; goodbye garage, hello workshop!

See in Red? = Thumb
As you can see, quarters were still a bit cramped for a while. With barely enough room to maneuver a sheet of plywood or drywall, or a board over 10' in the space, we knew this wouldn't do. Soooo... the dilemma; How does one keep the sweet profile of their classic home, while still adding much needed space? Think positive! Thumbs Up! Okay, that doesn't really make sense, but this does: we decided to add a thumb.

Here's a screen capture of the said thumb. I work for Chief Architect, and have the luxury of dreaming up all sorts of unrealistic modifications for our house, virtually... this one happened to have been realistic enough.

We were off to the races! John had a table saw and a jointer, and no room to use either. We took this opportunity to hire our first and only contractor for the project thus far. I must say he did a great job for a great price. We've just felt able-enough to tackle everything else.

The contractor hand-dug the hole for the addition's slab foundation. He set the forms and poured as well... he even took care of the permit!!

Here is a basic before and during...
I guess, after looking at these images, I'll have to bookmark a spot on this blog for our backyard development(s). We had no idea what to do with the huge mound of dirt and contemplated the problem for months (the foundation went in right before winter). In the end it stayed pretty close to the same location.

The garage/shop project was fun and enlightening. We were able to experience, on a fairly small scale, what is necessary to build a structure from the ground up. John met with the building inspector for all aspects of the construction, including the framing and electrical standards. We built the walls and were able to set them into place ourselves. We ordered trusses. We used the hardware for structural corners and connections, and had to research the code requirements to find the right ones.

In the end, the workshop is probably still too small! But it does work, better than what we used to have anyway.

AND... the addition created a pleasant space in the backyard perimeter that would perfectly accommodate a deck...

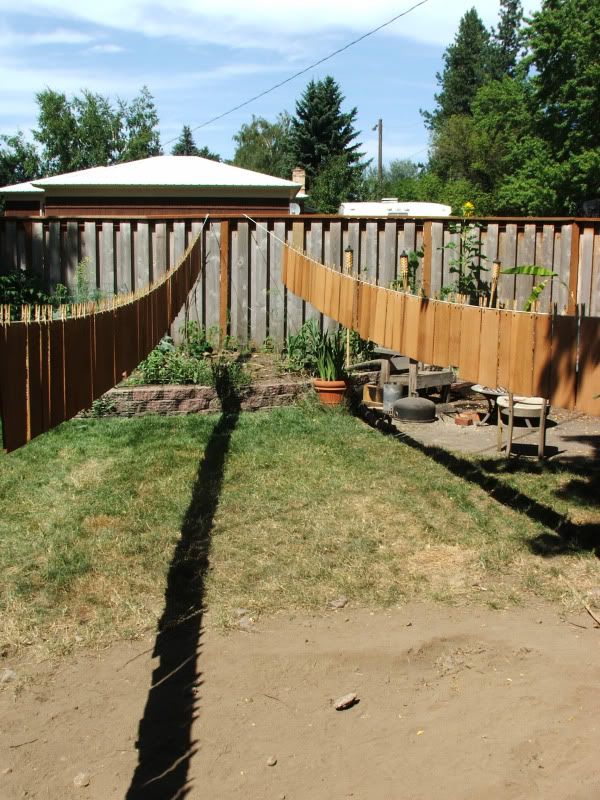
Note the clotheslines for shingle-drying...


Thursday, December 23, 2010

Cold Hard Steel

In the last post I shared John's creative custom work that was born from this home remodeling project.  The other custom work that really helps define our vision is the metalwork bracketry that we installed on the front porch and also in part of the kitchen renovation we've done.

Courtesy of my father, we gave him a general idea of what we wanted, and he created from scratch heavy-duty, but simple and appealing brackets to support the glu-lam beams in the house. The man is a wizard, and one of the most under-appreciated, under-utilized people I know.

My dream is that one day he will be discovered for the wonder that he is, then can spend his days tinkering away on amazing creations, as one would their most beloved hobby, while getting paid obscene amounts of money for his craft.


Wednesday, December 22, 2010

Stained Glass Craftiness

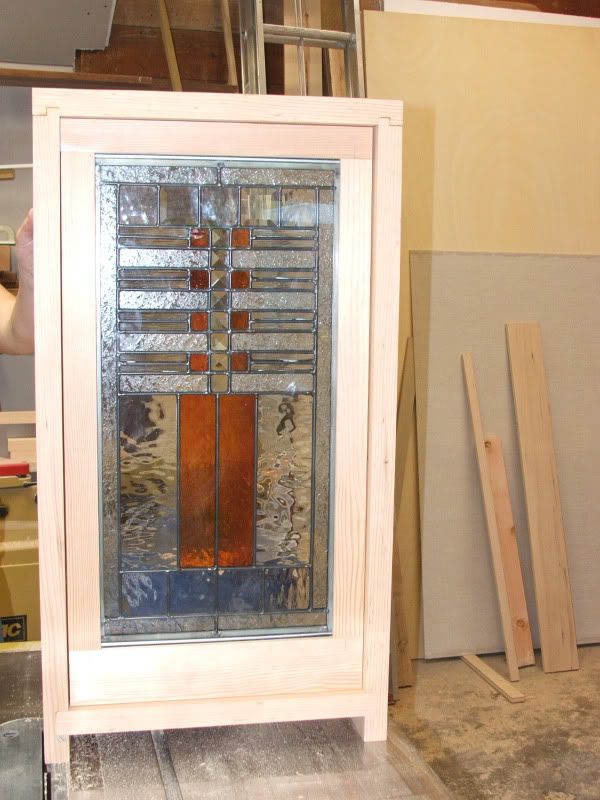
Out of great vision and even greater desire, John saw the need to learn to make stained glass.
This is one of the things I love about this man. We don't have a budget to hire a craftsman to undertake custom work for us... instead John becomes the craftsman himself.

The small window currently spans an interior wall. It is where the downstairs bedrooms' closets join. If you look closely, you can see the metal framing members for the wall in this image.
What is the best way to resolve the issue? We weren't sure... but we did have some reservation about moving the interior wall with a hunch that it may now be load-bearing. We also liked the little window and didn't want to simply board it over. After we ordered our front door with the stained glass design we loved, it only made sense for this to be another thread to the feature.
And there you have it! A custom built, custom made stained glass window. But that's not all folks...
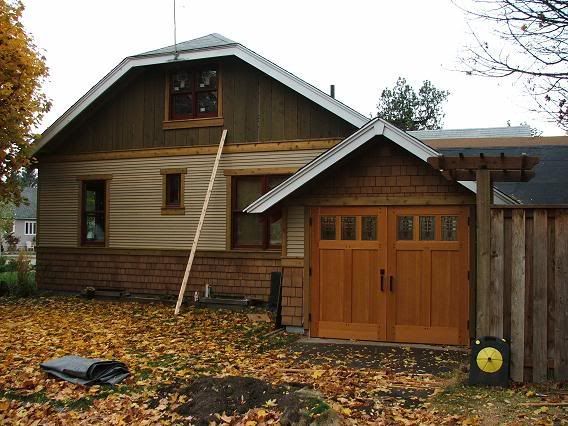
One window project wasn't enough. 6 more were added to the custom built VG Fir garage/shop doors. This is a John original construction! I'm impressed.

In the beginning...

...there was blue-gray, white, and lots of peeling paint. There were big drafty windows and no place to hang your coat...

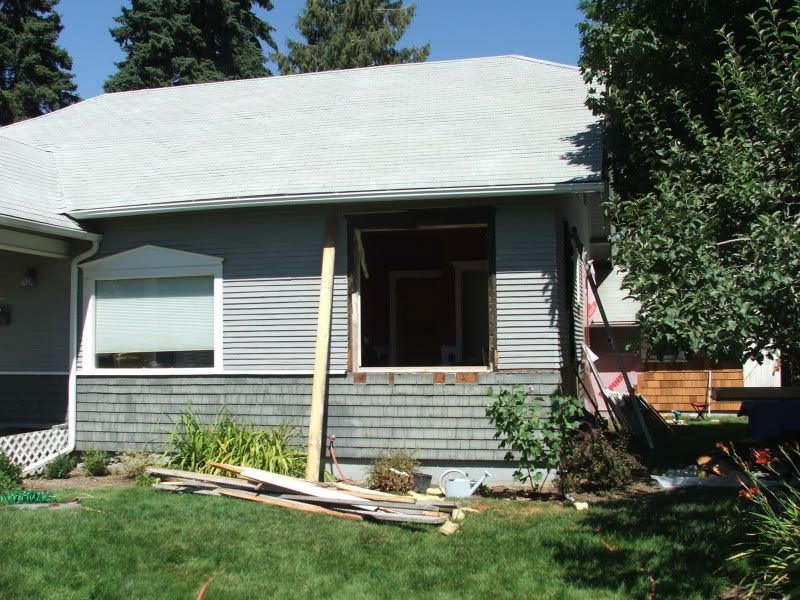
The big drafty windows were some of the first exterior projects we decided to tackle. It stared with just a few, but to date there only remains 1 window that was original to our house at the time we bought. It just happens to be the most obnoxious one, a huge picture window front and center. [Technically, even this window has been replaced, we did update the glass to an insulated double-pane with Low-E coating... but, we didn't have to alter any framing to get there!]

Altogether we've installed 15 wood window units. We chose Kolbe-Kolbe wood double-hung units with aluminum cladding exterior.

This hole was our first attempt at exterior finish work. Did you know that a permit is required in our town to install new windows? We learned quickly with a pretty red tag hanging on our door.

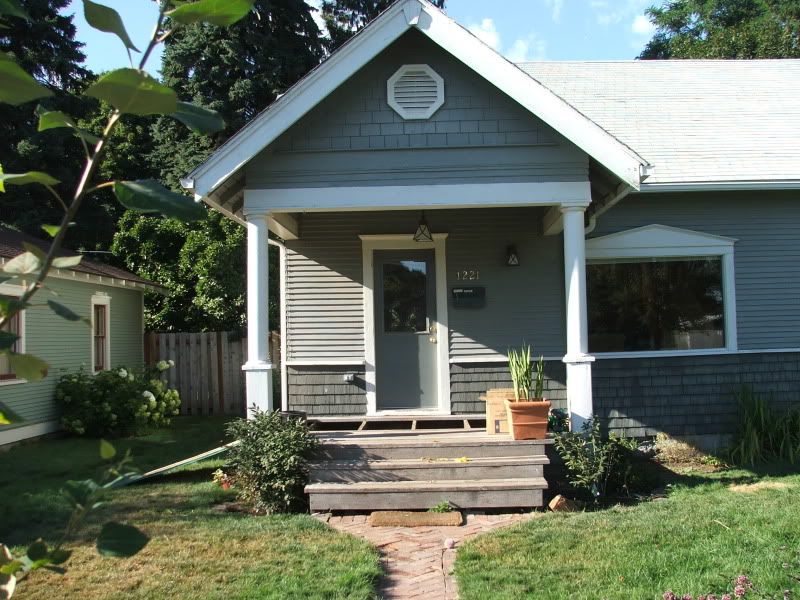
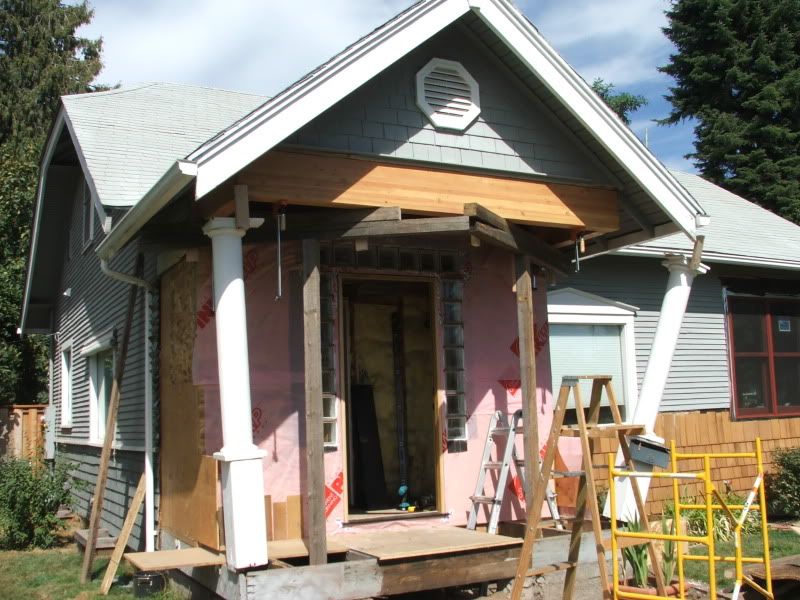
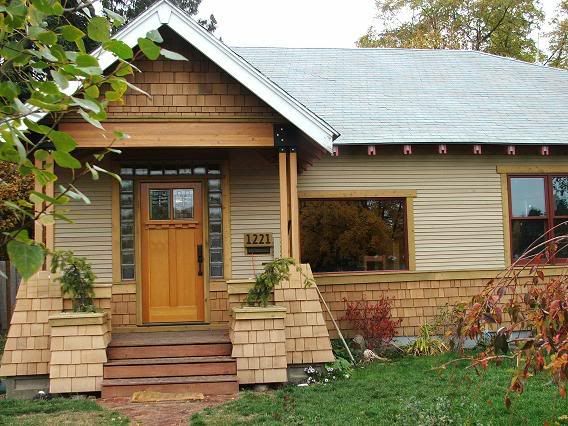
Around the same time, and after growing a strong distaste for the columns on our front porch, we dove into a front porch/entry remodel. We dreamed of a quintessential Arts & Crafts look with wood columns and beams and beautiful iron-work. The house was also lacking a formal entry which meant that any guests or door-to-door salesmen had access straight into our living room. To remedy the feeling of over-exposure, we confiscated some of the front porch exterior space and turned it into an interior foyer.

This photo is funny to me in some way. That dangling column looks pretty foreboding. Fortunately, nothing fell but the columns themselves (and in their own due time). Drive by in the summer and we'll likely be sitting on our front porch. I promise we'll wave.

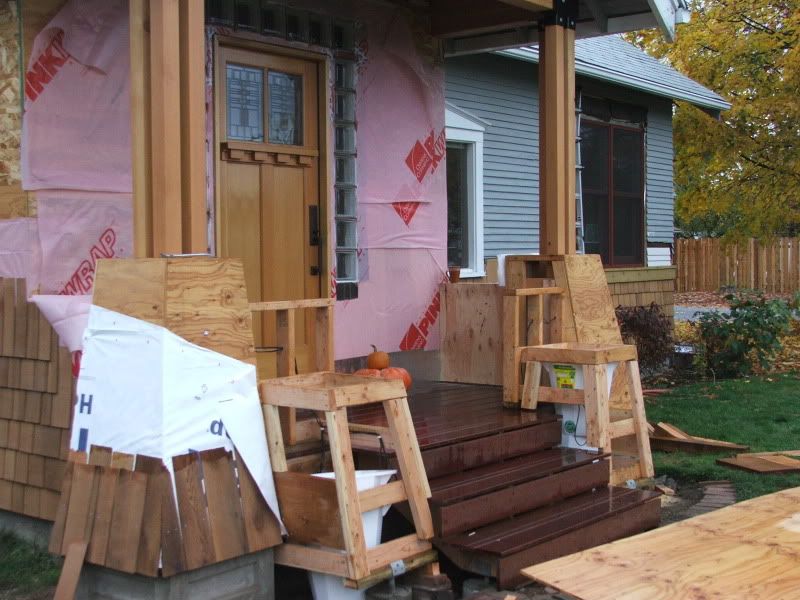
One of John's many detailed details, here is more progression of the front porch remodel. The front door is by Simpson and features a stained glass design by Frank Lloyd Wright, who happens to be John's favorite architect. The decking on the porch is Brazilian redwood. The two boxes adjacent to the steps are planters.

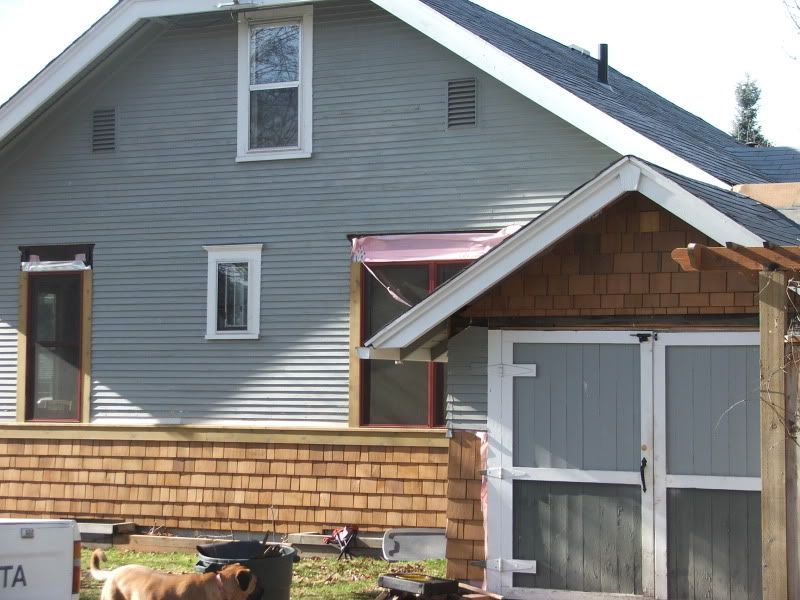
As you may have already noticed, we opted to get rid of the painted shingles and replace them with stained shingles. So, one may wonder, what is the proper way to stain and prep shingles for installation? We still aren't certain, but for an entire summer we had various rows of cedar shingles hanging in our backyard, drying on the line.

Once they finally dried, the shingles were installed. For what its worth, it wasn't a terrible experience to hang them all. I think I can claim to have done a majority of the installation. All it really takes is an upturned 5 gallon bucket to sit on, then lots of repetitive tinking with the hammer to tack them in place.

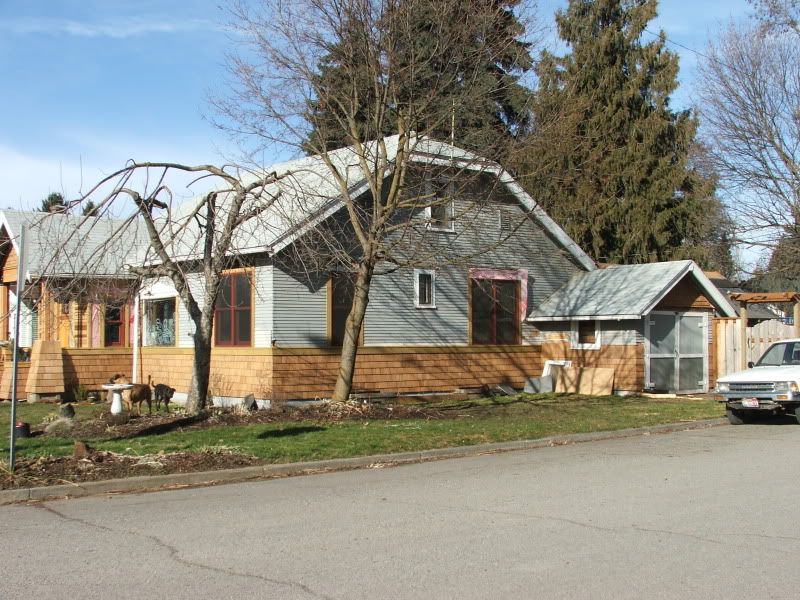
And there you have it! A halvesies house.
I'm sure the neighborhood thought we had pretty terrible taste. And knowing us, this stayed looking this way for many moons. I think this project started in 2004 or 2005. FYI, it still isn't completely done.

Here is a shot for before and after comparison... this is actually mid-early more than its before, but you get the general drift. Things to note: garage doors and small window with white trim, oh and the mostly black face of Simon!

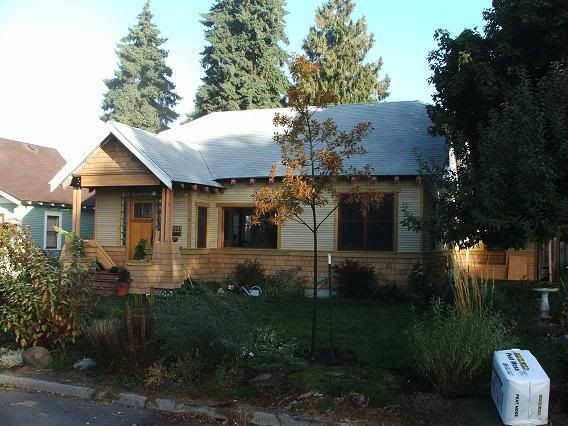
Now check this out! Seeing these differences make me glad that we started this project. It's really easy to forget how much you gain when you do-it-yourself with all of the stress and road-blocks that seem to be constantly taking the starring role.


This isn't the end of it by any means, and is in fact, just a teaser. We'll be back again with focus on one of the many other evolutions this place has seen... there have been more than a few!