...or fast. Because it won't be, at least not in my experience.
You do, however have to keep in mind the source of this advice. For our kitchen remodel we opted to do all of the work ourselves. This wasn't just a replace-or-paint-what-is-there sort of project. No, we don't make such practical or manageable decisions. This was a gut-everything-move-structural-walls-electrical-plumbing-expose-the-wall-and-floor-framing-then-craft-beautiful-wood-cabinets-and-insanely-time-consuming-concrete-counters sort of project.
Here's the breakdown, plus some tips for your version of this project. Hindsight really is 20/20:
 |
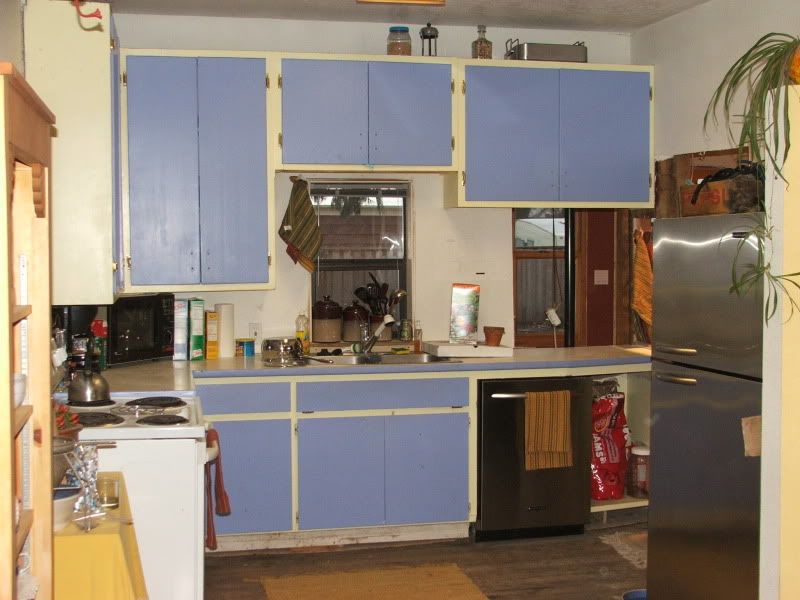
| This is pretty close to what the kitchen in our house looked like when we moved in. We added the SS Fridge and DW. The floors were unfinished DF for a long time... I'd gotten many splinters here. ADVICE: Every household MUST have at least one reliable pair of tweezers; don't be afraid to handle your partners' feet, it is likely that their hands and minds have been working hard for you all day. |
 |
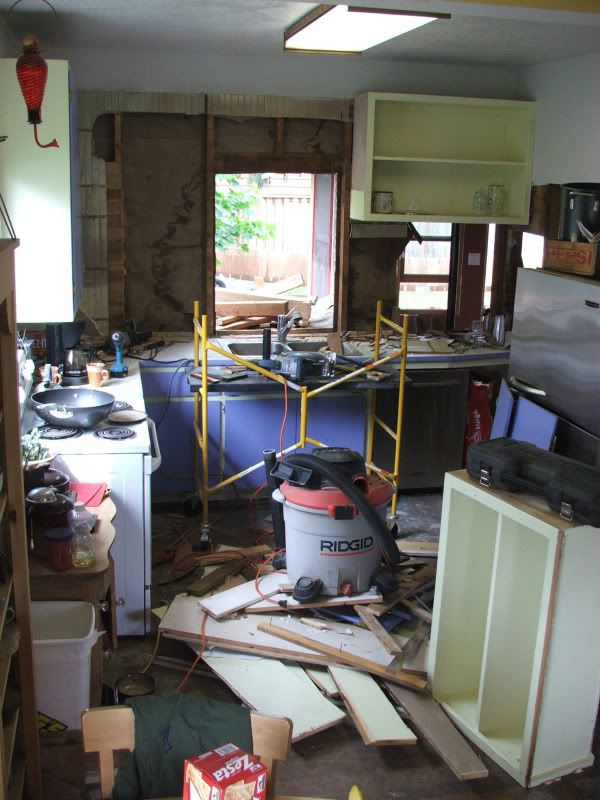
| Phase 1, Demolition: Here are our first destructive measures. Adding a bigger window. Notice the phone nook and beam in the Living Room... those are important later on. ADVICE: Clean your dishes and put your crap away before you start demolition... and before you take a bunch of photos you may one day share publicly with the virtual world. |
 |
| Major destruction... fun stuff to live in. I think we were probably eating at Moon Time a lot during this phase... or maybe just lots and lots of soda crackers. ADVICE: Budget for lifestyle changes in addition to materials. It is worthwhile to pay yourself somehow when you are permanently temporarily inconvenienced during a gut job. |
 |
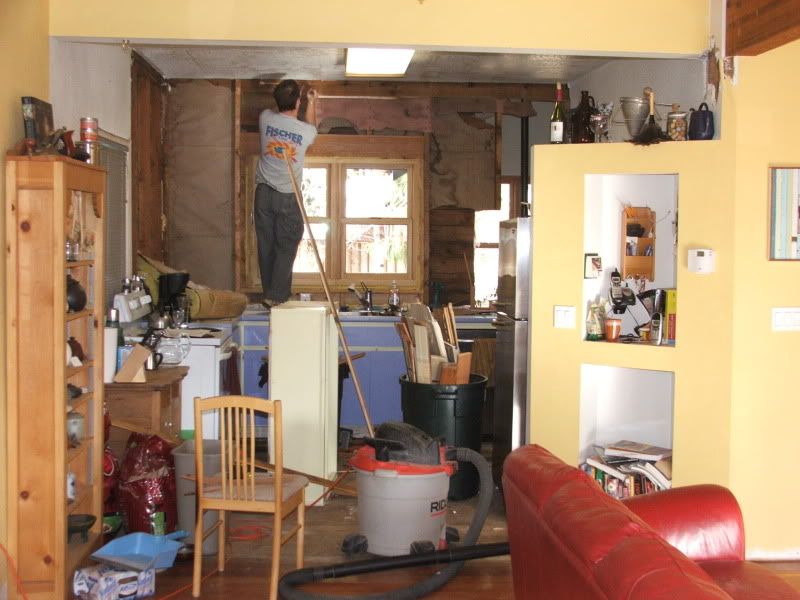
| Here's the beginning of Phase 2, Structural. The wall finish, ceiling finish, and dorky phone nook are going away. ADVICE: Familiarize yourself with your favorite garbage disposal methods. Big chunks of drywall are a mess to fit into a street pick-up garbage can. |
 |
| I think we worked on this around Christmas (wink), demolition complete. ADVICE: Never use the word "complete" unless where it is prefixed with "almost" or the like. |
 |
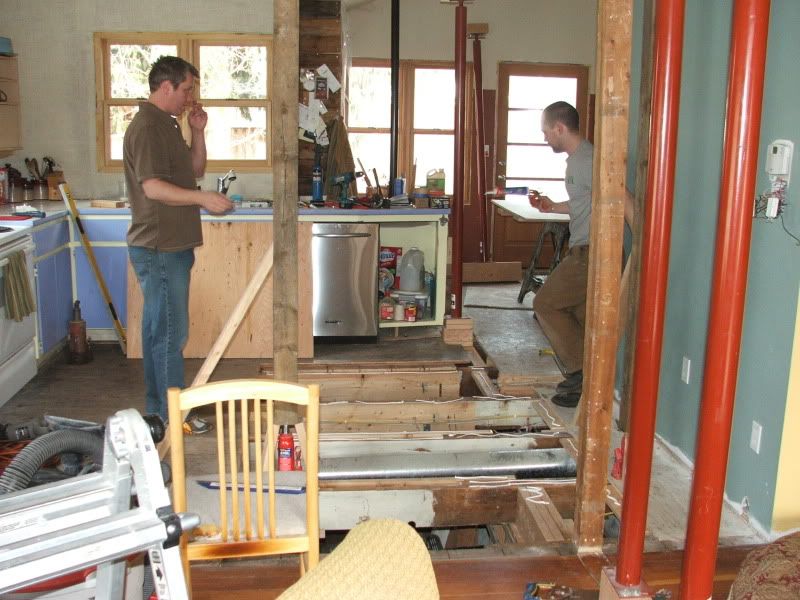
| So, to place the beams, we had to add support in our basement, per the floor opened up for this purpose. I think we lived w/ a gaping hole in our kitchen floor for 2-3 weeks. ADVICE: Watch your step. |
 |
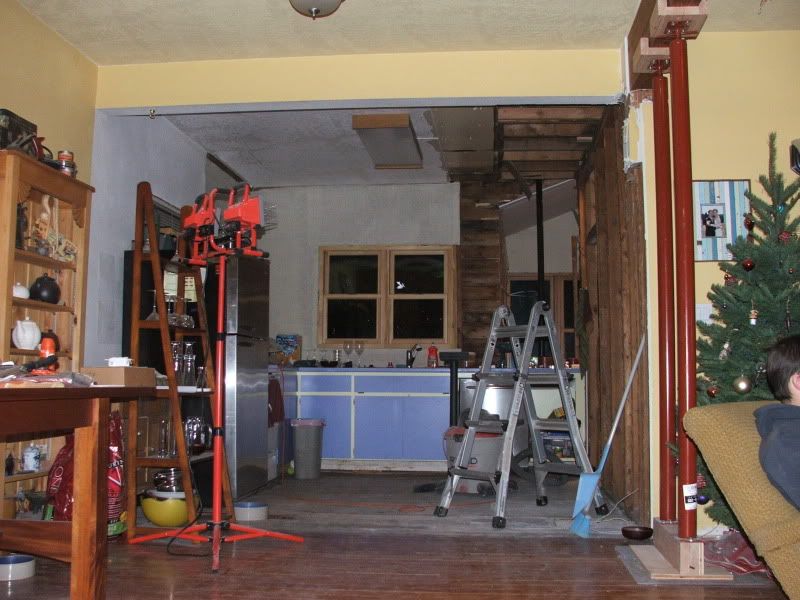
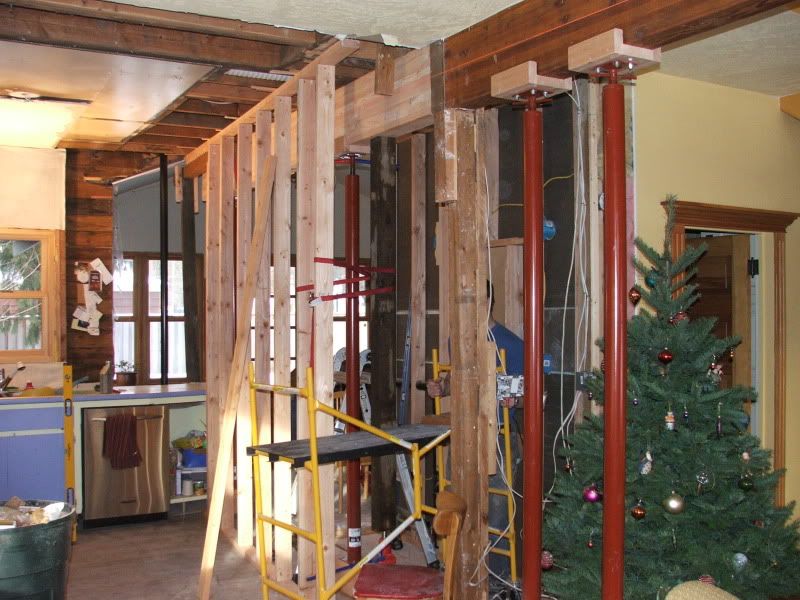
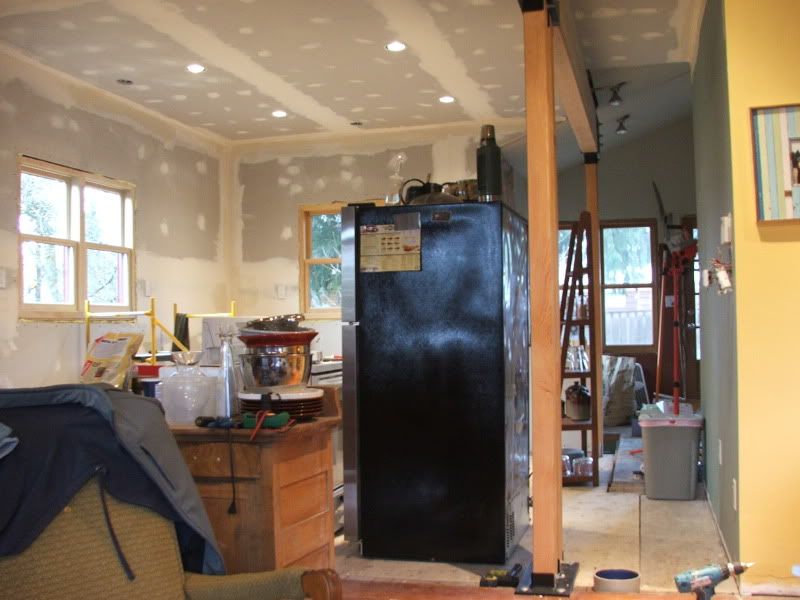
| Remember that beam? It just grew 14'. We were able to gain 2' from our bathroom to add to the kitchen. You can see the brace wall holding up the 2nd floor and roof while we move this beam into place. Merry Christmas! ADVICE: Learn the basics of bracing. Bracing concepts are your friends... and nearly timeless ones at that. |
 |
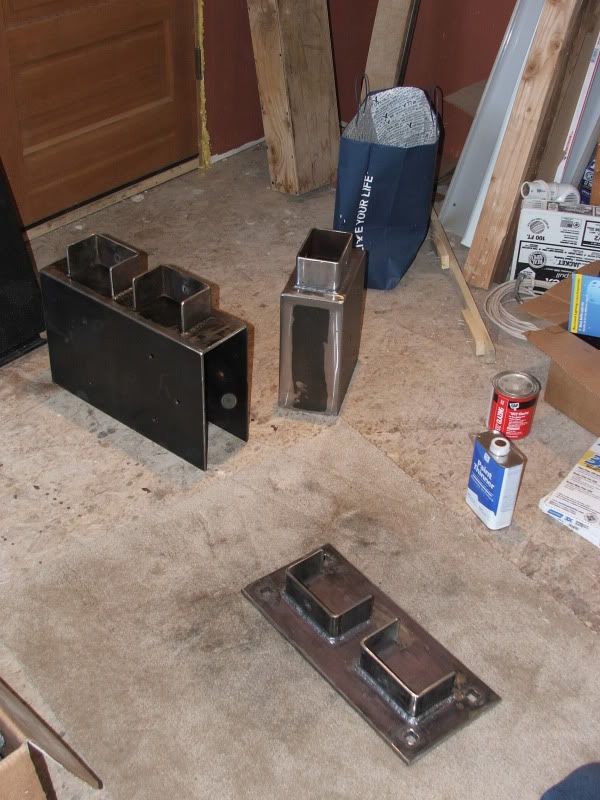
| Have I ever mentioned my father is an AWESOME metal worker? Here is some of his work in its early stages. These pieces really help define the character of our house. Shout OUT. ADVICE: If you have an amazingly skilled and gifted crafts-person in your life, include their art in your projects. Shout their amazing virtues to the world. How else will any other person know of them? Even if your voice is not loud enough, their impact on your vision is invaluable... cherish it. (I'd love to see your visionaries! Link to them in the comments.) |
 |
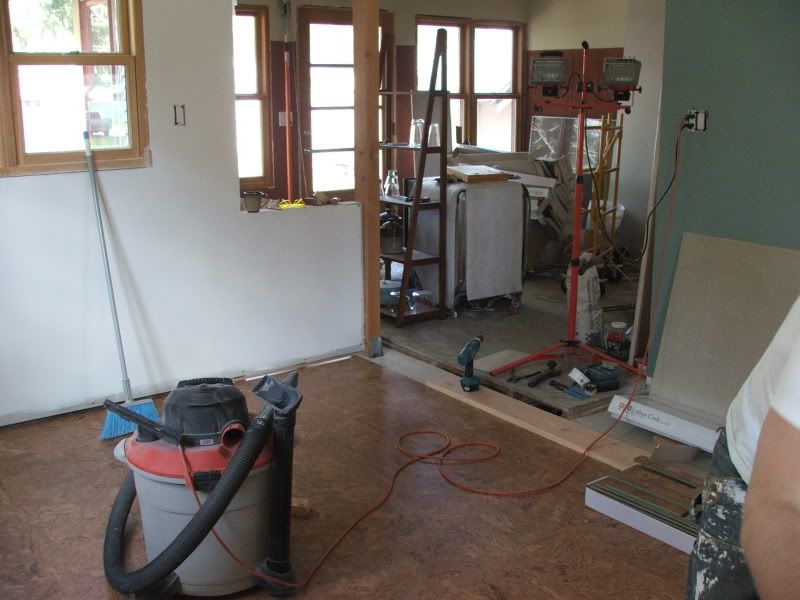
| Phase 3, Layout: Here's the empty kitchen w/ new cork floor. Love the cork, it hides most indiscretions. ADVICE: Mopping the floor is for people who don't have enough other projects looming. Start more projects if you ever consider mopping your floor. |
 |
| This really shows the new space. The fridge takes up about the same space that the old phone nook did. The gap between the post and the blue wall used to be part of the bathroom. Good reference of scale of the kitchen then and now. New windows that open too... Woot! |
 |
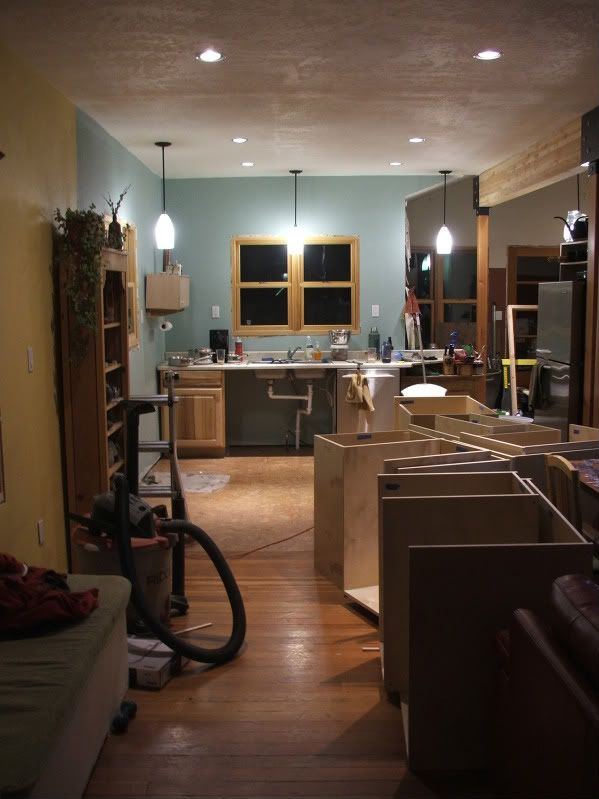
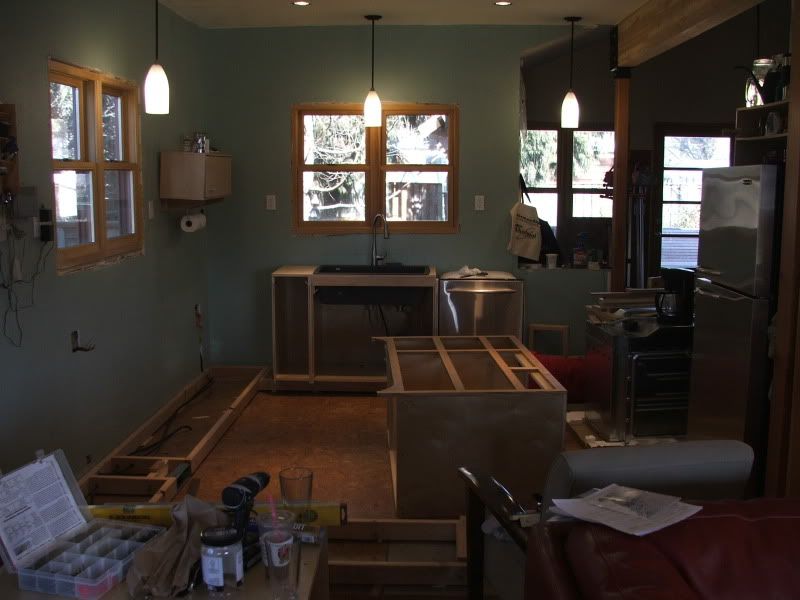
| Phase 4, Hibernation: We lived with the kitchen in this state for at least 3 yrs (sans new cabinet boxes). You can see in the foreground the new cabinet boxes that will fill the space. Also, the range is missing here, but you can see the plastic on the left where it once sat... ADVICE: Avoid Phase 4. |
 |
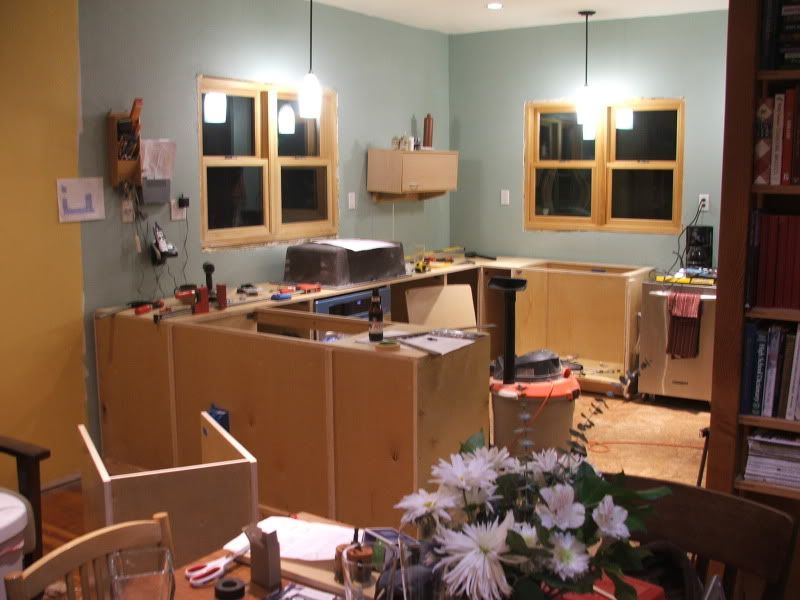
| Phase 5, Revitalization: Ah! Boxes in place! ADVICE: Patience is important when the person with skill is the person doing the work. Remind yourself that you are only one or two rungs above spectator (being part of the peanut gallery doesn't help anyone). Beer helps, so do diagrams of the final cabinet layout. Keep both handy. |
 |
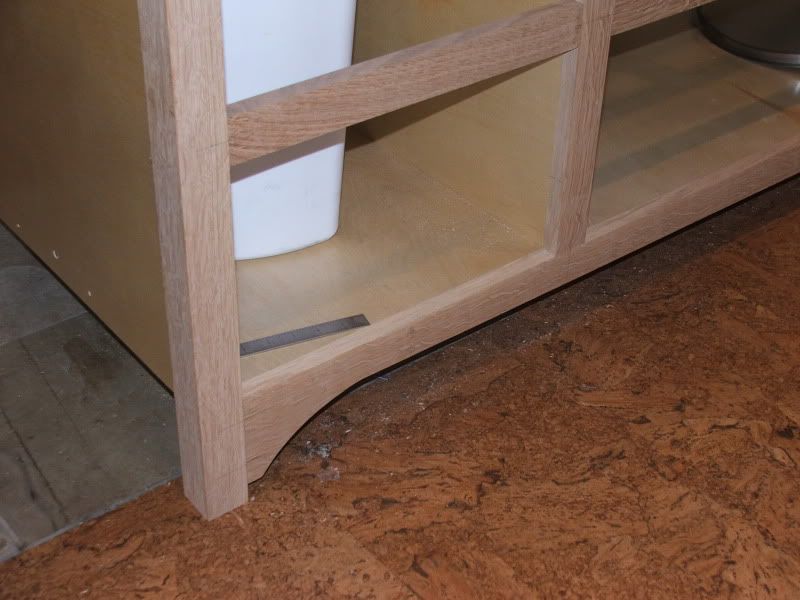
| Phase 6, Face Frames: The cabinet face frame and doors are Quarter Sawn White Oak. This is the stuff you would traditionally see in Arts & Crafts furniture with the groovy figuring. Kinda looks like tiger stripes, but a little more subtle. ADVICE: Appreciate and celebrate the details as they emerge; the hint of your final result, no matter how small, is the best motivation to see your project through. |
 |
| Even though the cabinets were in place once, it was only a rough fit. The boxes had to be removed then the face frames attached and then put back into place. ADVICE: Patience is important when the person with skill is the person doing the work. Remind yourself that you are only one or two rungs above spectator. Beer helps. |
 |
| This is the longest bank of cabinets, measuring over 11' in total. You can begin to see my appreciation for JG. I think she helped move this in and out of place at least 3 times while I was in my comfortable air-conditioned office. The price you pay for good work... John did an awesome job making sure it looks great! ADVICE: Make friends who are happy to lift heavy things once or twice. Make lots of friends like these... generally you can only sucker them into helping you once or twice. There are often more than one or two heavy things. |
 |
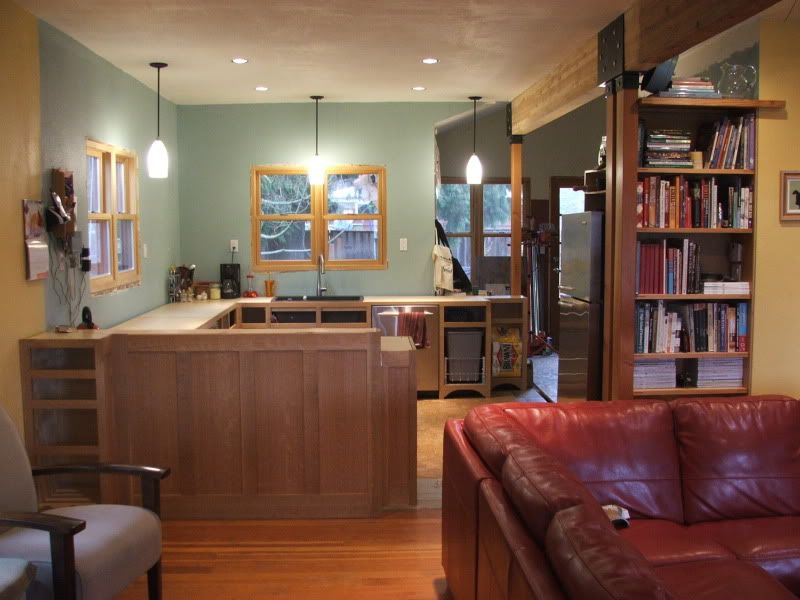
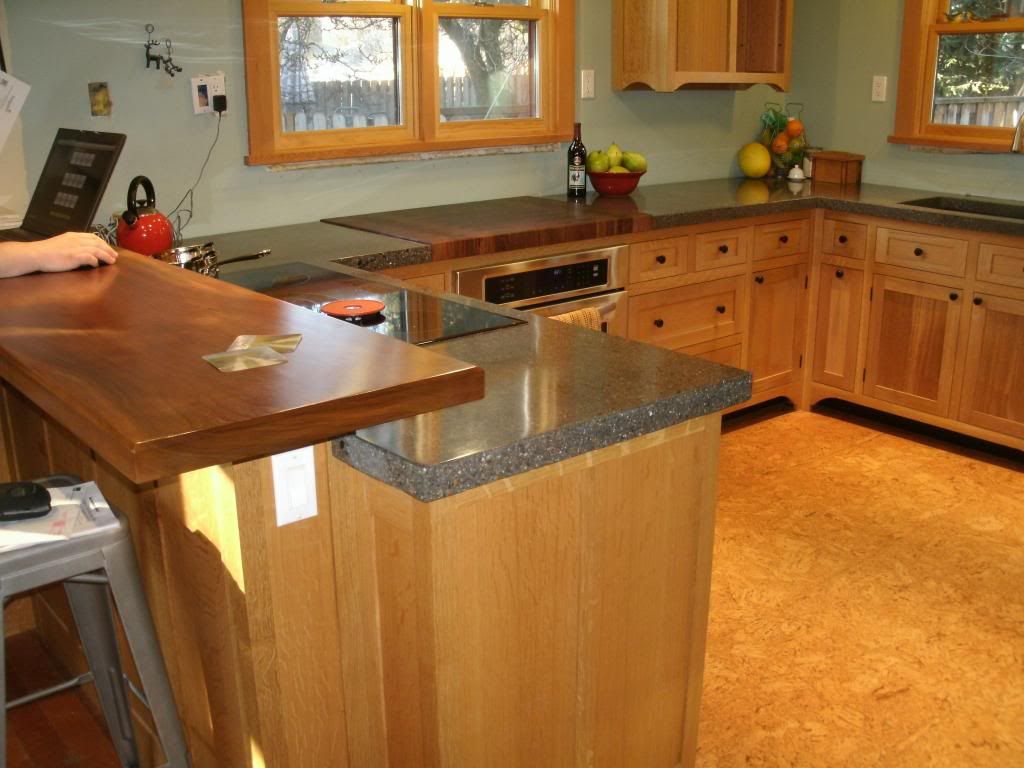
| Phase 7, Functional: Skipping ahead a bit, here is the view from the foyer! Pretty awesome, eh? The kitchen is functional here, complete with sink, oven, cooktop, and dishwasher. ADVICE: Embrace functional. It works. |
 |
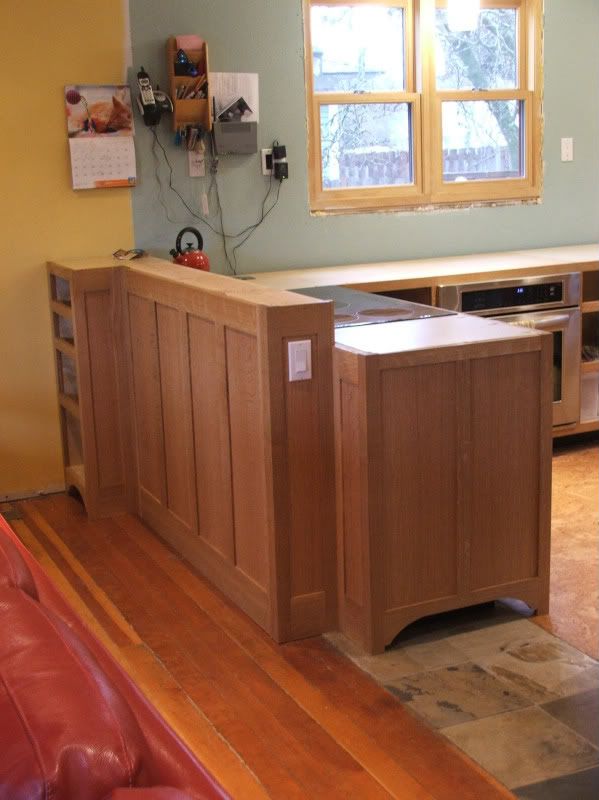
| Here's another of the bar. It looks like a piece of furniture. What you can't see are the lack of doors and drawers. We lived with cavities for at least a year, but still enjoyed better storage than we ever had before. ADVICE: Don't put off going to the dentist. |
 |
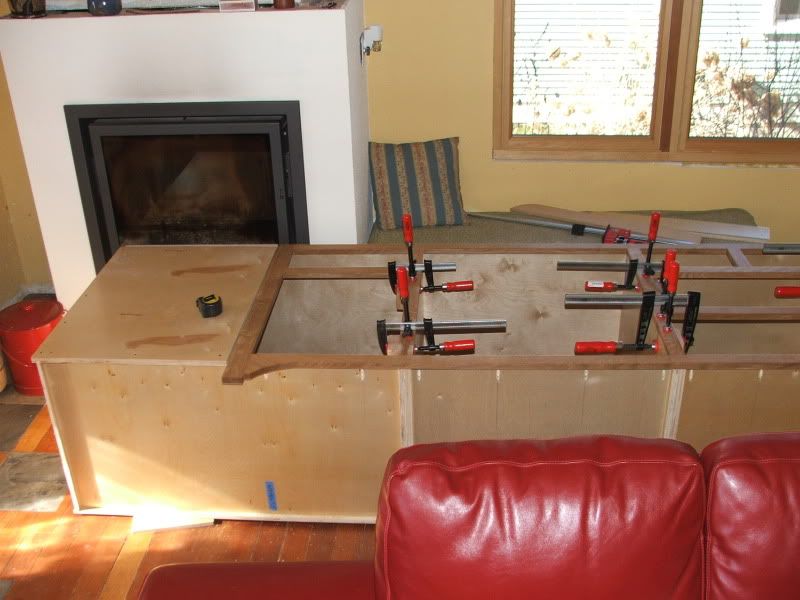
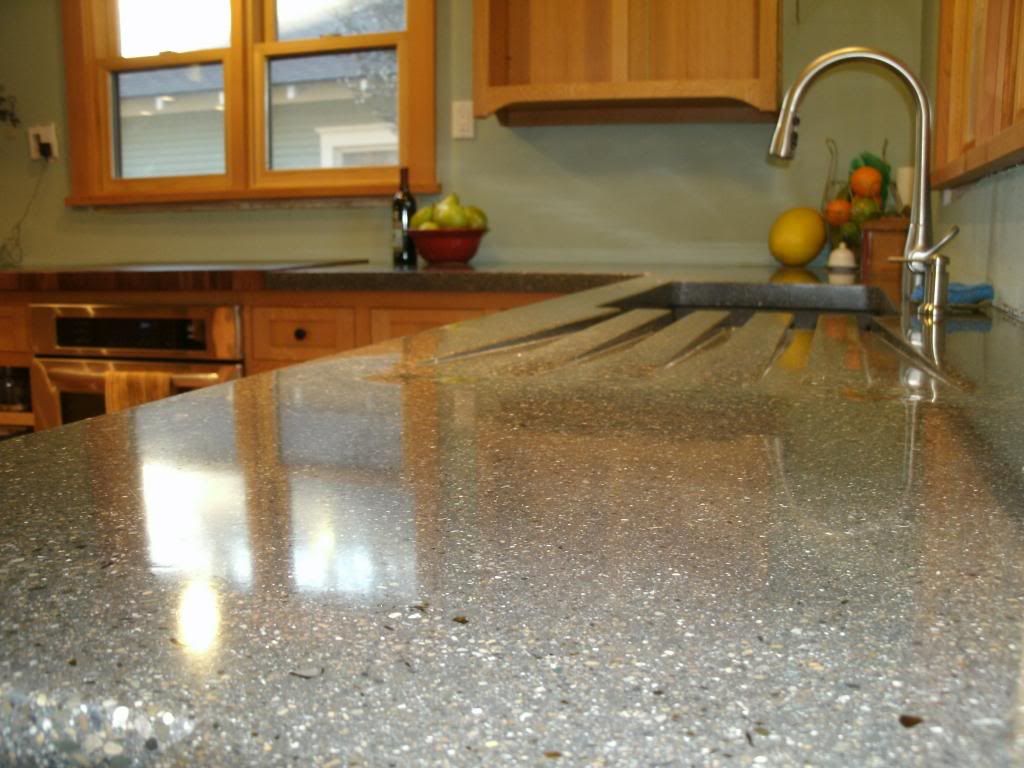
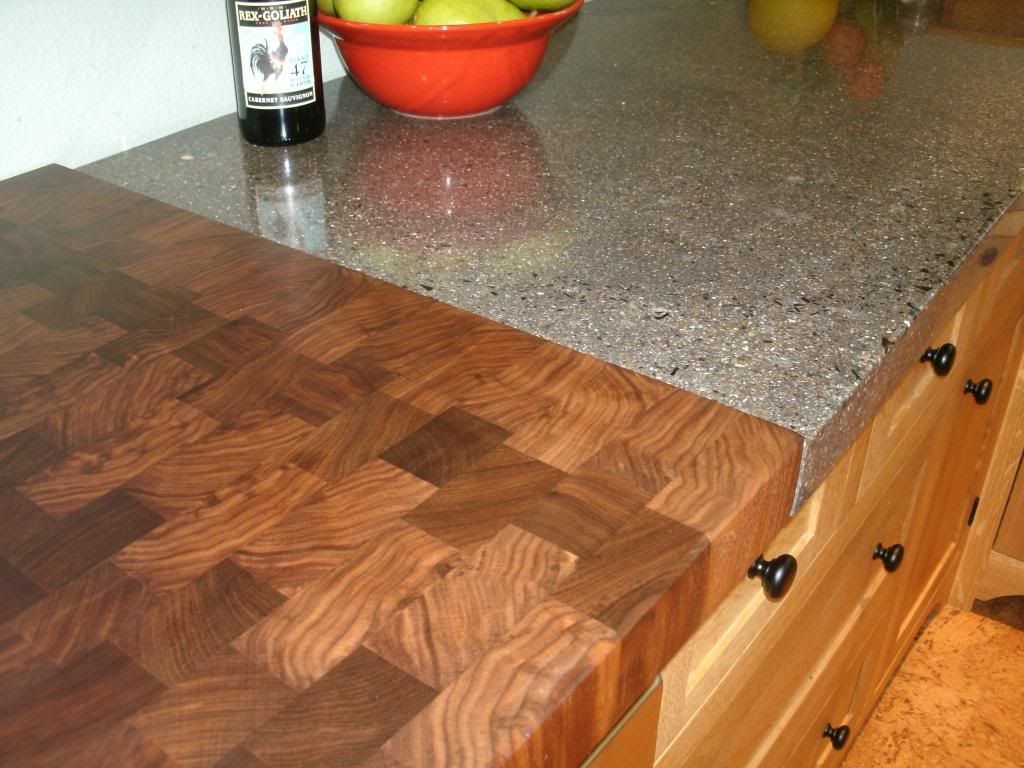
| Phase 8, Counters: Concrete counters. I think they are glorious. This shows the built in drain-board. ADVICE: If you ever want to punish yourself once it is time to grind smooth your concrete counters, include a built in drain-board. We love ours. |
 |
| Here is the walnut butcher block we added as a spacer between concrete slabs. It actually served an important purpose in not requiring us to seam two of the concrete pieces, and in breaking up the long counter span. Oh, and we can cut food-stuff up on it too. ADVICE: When you are creating ridiculously work-intensive surfaces, you may as well mix it up. It would be boring to stick with only one medium. |
 |
| We also added a walnut slab over the bar area to tie the two materials together... maybe one day I'll write blog entries about these, and also about the concrete counter process. ADVICE: Document your projects during hibernation, it is difficult to remember details years later when you are left to just make stuff up out of desperation. |
 |
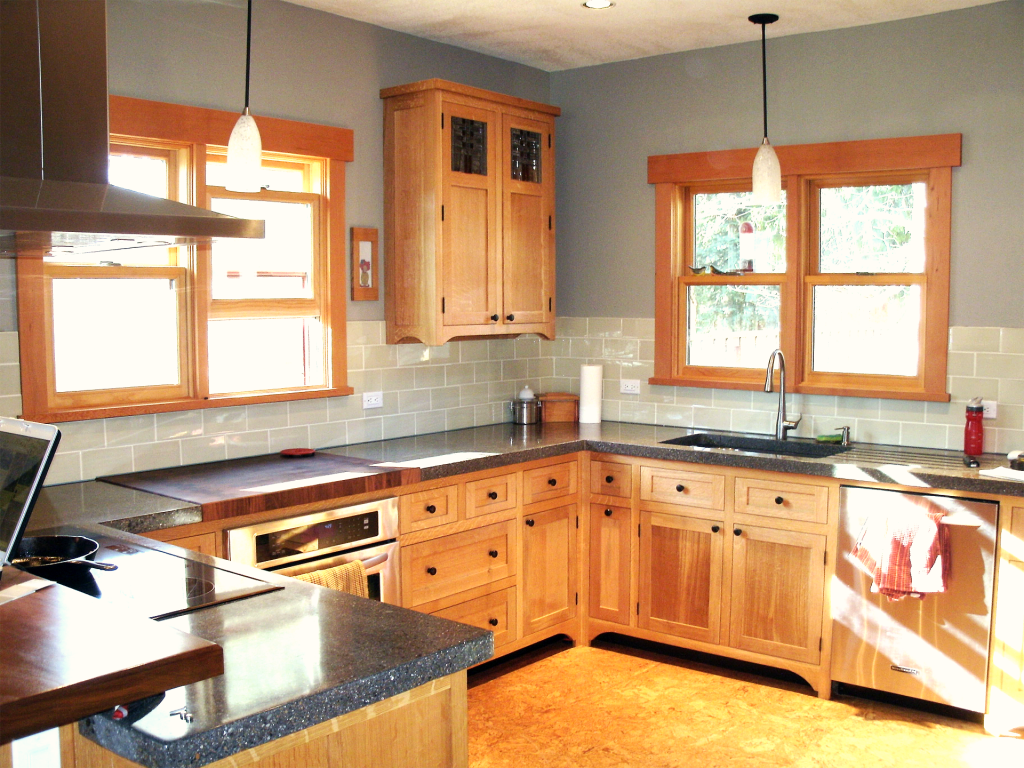
| Phase 9, Backsplash: We agonized for too long over the tile to use for the backsplash. I wanted something safe, like white; John wanted some thing bold. We settled on this grey-green color. What is funny/weird is that if you hold this tile up to my living room walls, bathroom tile, exterior siding, living room chairs, or dining room accent color, you will see they are perfect color matches. Safe or bold, my ear. The heart wants what it wants. Apparently mine wants Carrington Beige. ADVICE: Listen to your heart. Cheesy? Yes. |
Good Luck!

No comments:
Post a Comment