Tuesday, June 24, 2014

Chickens in the Dog Run, Dogs in the Chicken Run

*This story is about 3 years old... I've just gotten around to publishing it.
**This story doesn't have a great ending... if you are sensitive to the reality of our flaws, proceed with caution.

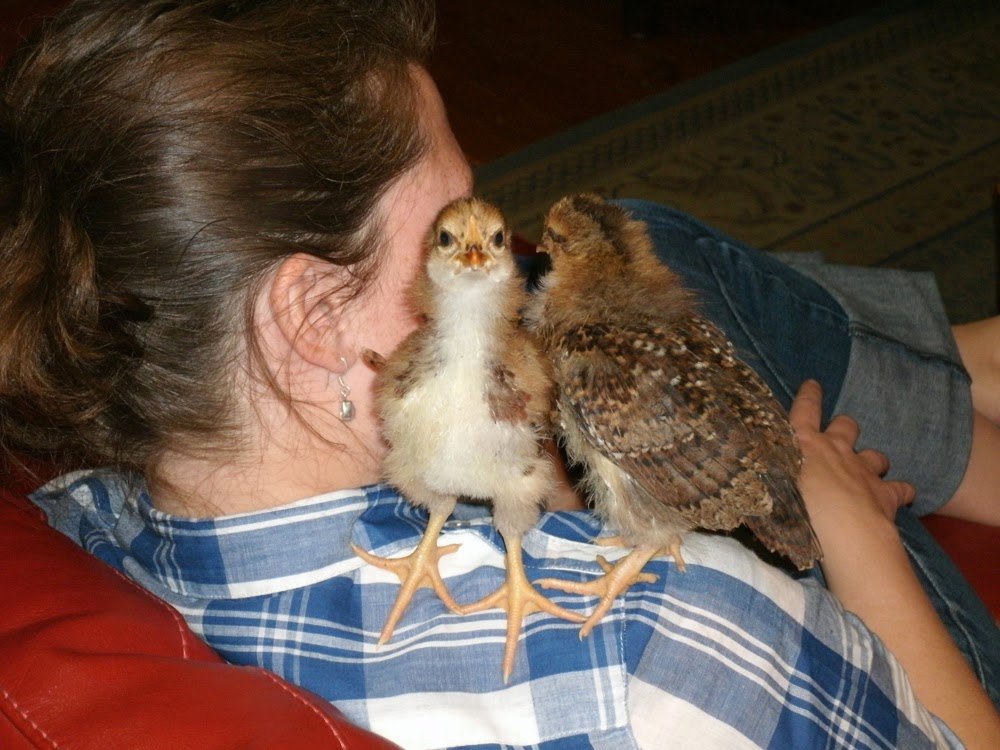
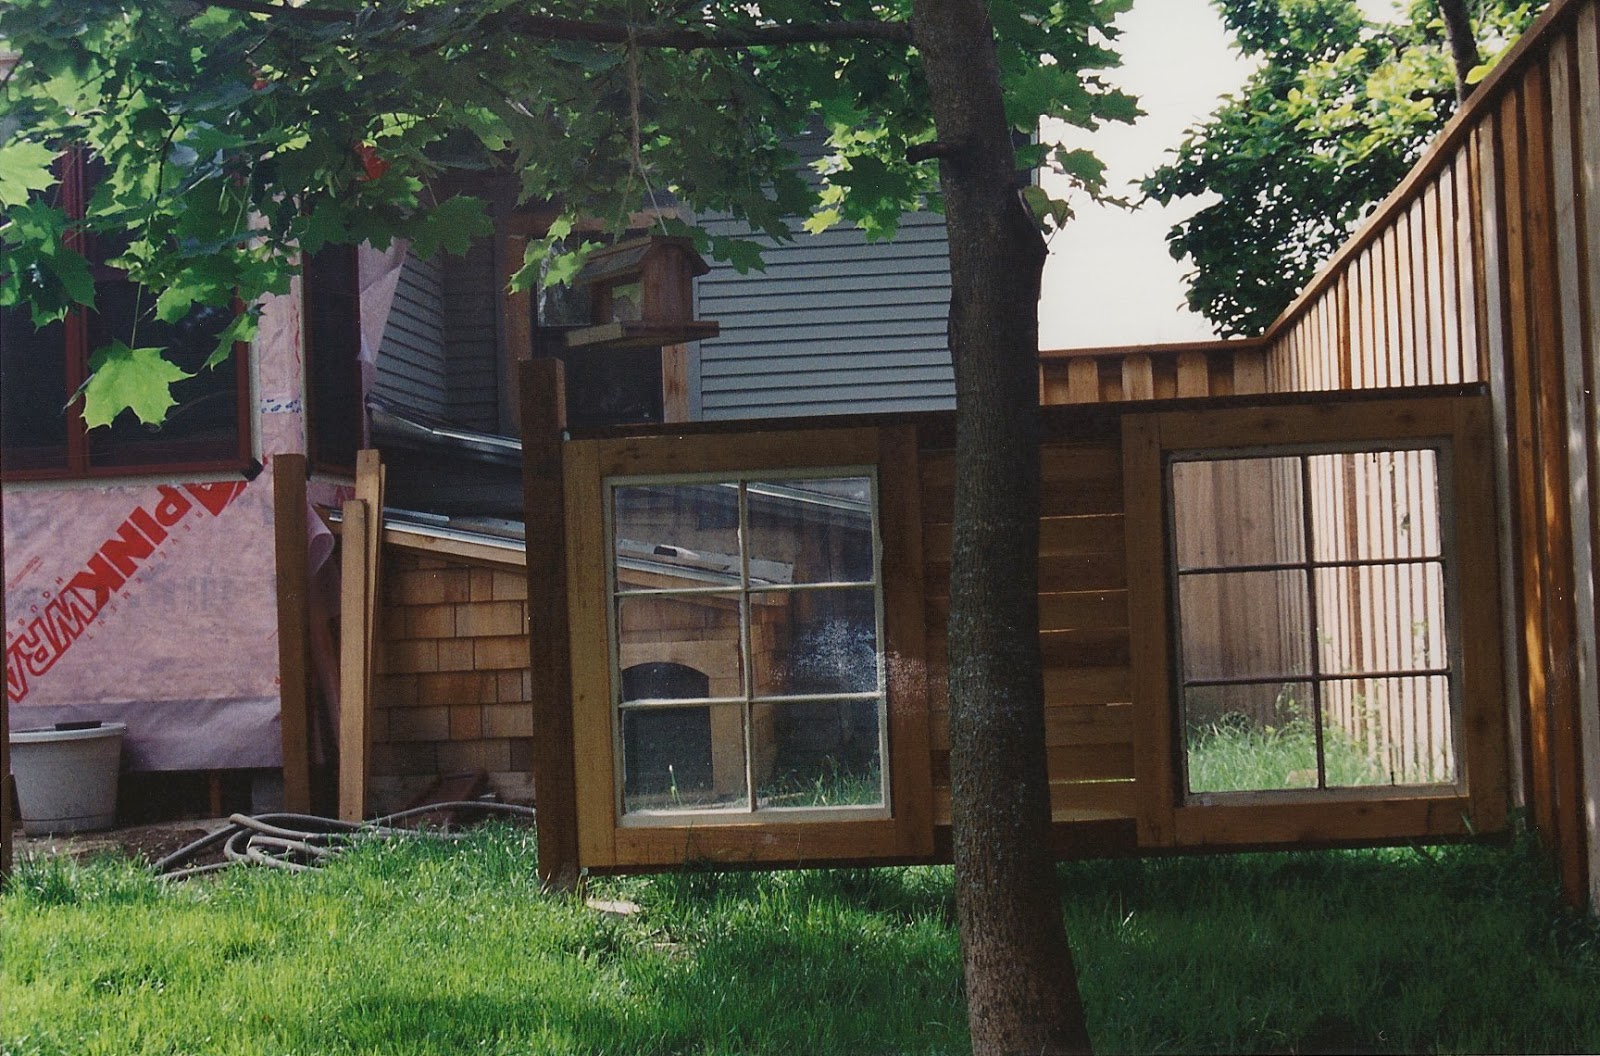
I have to admit that I was both proud of my newly constructed chicken coop/enclosure and anxious to put it to use. Too anxious, I know now.

We already talked about building the coop in this other post, but of course, one structure is never enough... there's always room for more. In all of my readings about chicken rearing, one common thread was 'Beware the Wiley Raccoon.' It put a fear in my heart with horrid visions of the masked bandits defiling my little ladies. If you've never read on the topic, the concern is real. Apparently the critters are fond of good ole fashioned be-headings.

I was warranted to be worried, we've lost many a koi and goldfish to Rocky Raccoon. I've seen the corpses and paw-prints to prove it. I've seen that cute little masked face mock me, peering over our roof's overhang, as I hiss and throw pine cones with futility. Raccoon are indifferent.

So with our best intentions, we created an enclosure. We buried the wire deep in the ground so the 'coons couldn't dig under. We installed gate latches and John and I each endured a learning curve in mastering their operation... because raccoon can learn to open anything according to the interwebs. The final result looks to be attractive and quite useful... I suppose ultimately it has been. Let me be the one to inform you that for most projects you dive into, the prototype will not be without flaw. If you are the sort who IS able to create flawless prototypes, I both envy and pity you... how will you ever feel the sharp pains of disappointment and the satisfaction after successful solution-scrambling? It is better to have tried and failed and fixed, than to never have failed at all.

I know, you are itching with wonder; "This beauty, whatever could be wrong?"


Lucky you, I'm here to tell you:

Door = Too Low, Header Edges Too Sharp
Space Between Fence and Coop 'Designed' for Bike and Mower Storage = Too Narrow
Compost Bin = Too Poorly Braced
Hog Wire for South End Enclosing = Too Big and Installed Upside Down
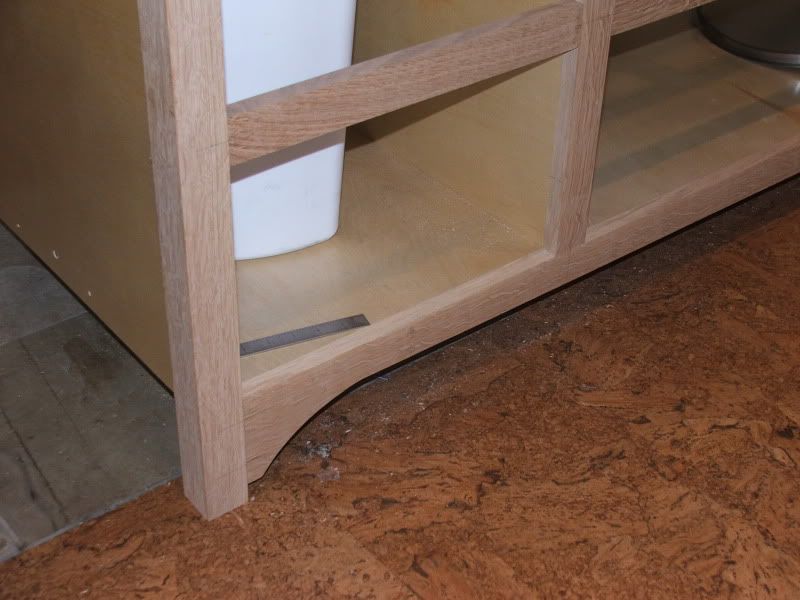
Gaps Between Coop and Ground = Too Gappy

I've banged my head on the door header, causing an explosion of expletives and raw scalp. Chicken-sitters have also fallen victim to the booby-trap. I still haven't taken the time to soften the edges to mitigate the damages.

The bike storage houses barely 1 bike, awkwardly at best. We've since had a brand-spankin'-new-bike stolen from our backyard... I blame inadequate bike storage.

The compost bin regularly twisted, contorted, and tried to collapse due to the lack of cross bracing and diagonal bracing. We have fixed this one! Compost is important, so is a basic understanding of bracing if you are going to DIY.

The hog wire and gaps under the coop were flaws which obviously contributed to the anti-functionality of Chicken Enclosure 1.0. Welded Hog Wire has smaller gaps that go on the BOTTOM, near the ground, the bigger gaps go up higher so the hogs don't stick their snouts out.

You may be speculating on what happened next, though if your guess is that the anti-raccoon precaution was for naught, you might be wrong. Since adding the chickens we haven't seen any sign of raccoon in our backyard (knock on wood).

In fact we had the perfect storm of ineptitude.

Prematurely Cooped Pullets + Gaps in Enclosure + Dog Run Gate Left Open + Humans at Work = Chicken Mortality

Long story longer, here is what happened:
It was on a Monday. The pullets had been sleeping in the coop over the weekend, but were still new to the space and exploring. A few had figured out they could squeeze through the hog wire and under the coop to the greener grass on the other side. I had made plans after work that day to gather rock from my sister's house to create a barrier under the coop so that the raccoon couldn't get in.

John, before leaving town for the week, had advised me to leave the chickens in the house for the day, but 9 week old pullets are smelly and good escape artists. I was tired of cleaning up after them in the house and I was going to have the solution by the end of the day. Right? I even left the dog gate open to the yard so the chickens would have defenders in case a raccoon or a bold feline came around.

Now you are starting to see this fall into place...
Apparently Maggi was not their champion but instead their antagonist. I came home after work, with a truck bed full of rocks, and found feathers like snow, two dead chickens, three remaining skittish birds, and two sheepish dogs. I was able to piece together the general events. The chickens squeezed out of their space then Maggi came outside to see their fluffy bottoms. Knowing that there was no one home to tell her 'No', she was free to do what dogs do best.

I felt awful. I was glad John wasn't home so that I had to bear the solution myself and clean up my own disaster. At first I thought Simon was the instigator because he looked so guilty, but in hindsight I think he just knew that something really bad went down. It was another week before I saw Maggi get a mouthful of fluff (leaving the chicken with a few less feathers, but otherwise unharmed) then I knew for sure it was her. We had a stern talking-to with her, and some intensive nose-to-beak time dog-to-chicken. I definitely don't trust the mutts 100% anymore and have learned a good lesson about guarding against the faults we have at home instead of only focusing so strongly on potential or unknown threats.

The remaining three chickens developed into good laying, funny, curious, big birds. We now have Chicken Enclosure 1.5, Dog/Chicken Run 2.0, and have upgraded to Flock 3.0. I'm glad to be able to learn for our future flock.

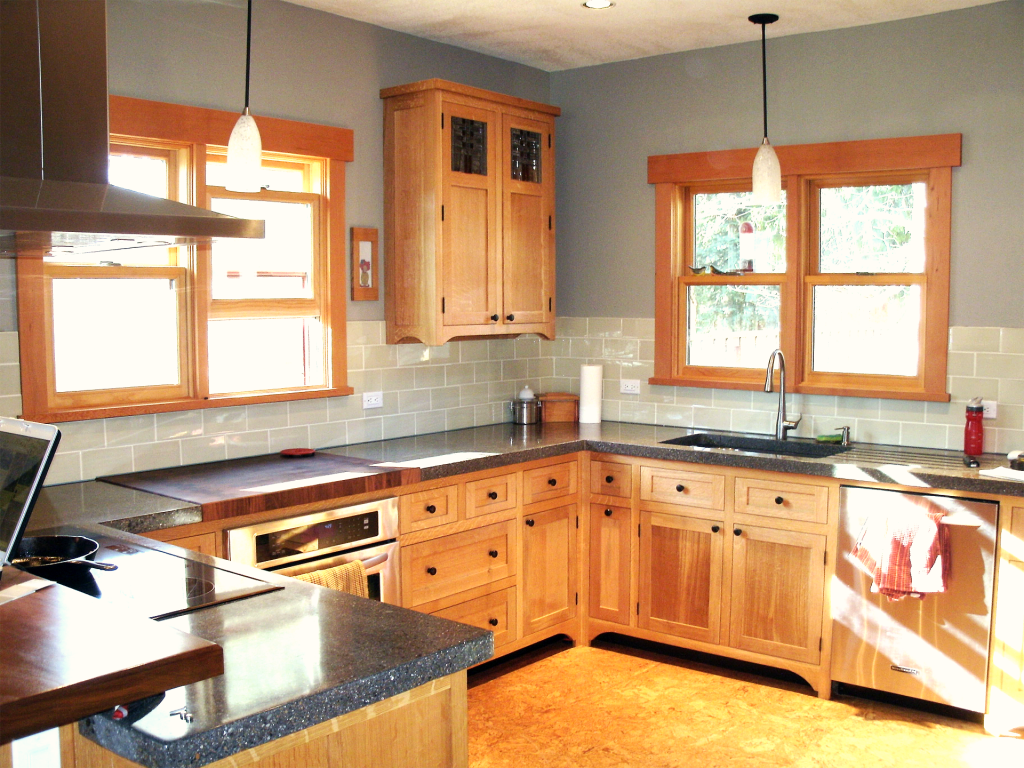
Tinkerbelle, Jezebel, and Cindy-Lou in the dog/chicken run, begging for treats at the kitchen window.

Wednesday, November 13, 2013

All Cooped Up

If you aren't familiar, there is an entire rearing period for raising chickens. Those sweet, fluffy, chirping little darlings that come through metered mail can't go hanging out in the frosty mornings and brisk afternoons of April in the Inland Northwest. We chose 3 Deleware's and 2 Speckled Sussex's for our first flock.

Really, it isn't until they are around 9 weeks old that they have enough feathers, and the weather is warm enough, for the fledglings to cope with the real world, and boy-o, it doesn't come fast enough!

The fluffy little fluff-puffs are pretty darned cute, until you hear their sad chirping of loneliness, or even worse, symptoms of pastey-butt. Pastey-butt, as I've learned to call it, is a terrible chick ailment where their poor fluffy bottoms get, well, pastey and clogged. Look it up. At any rate, it can be a deadly condition if not managed well, and really stressful to see these little babies sick. I was fortunate not to lose any of my chicks to this, but I certainly did my time of cleaning and caring. And by-gum, we made it!

We did our research and read about handling our new layers to help them become accustomed to us, and also to accustomize our dogs to them. We have two big-ish dogs, if you haven't tuned in. One is a German Shepard/boxer, the other a plott hound/boxer. Neither of them are good with cats, which led us to be concerned with chickens. Let's be honest, chickens are food animals. If cats look like food to our dogs... well... We worked pretty hard to establish that acknowledgement and overcome it. I remember there being a few moments in history where my personal confidence of my canines' relationship with our chickens was much higher than those of others. Call it foreboding. Call it a mother's love.

By week 4-6, baby chicks aren't as baby or sweet and cuddly anymore. They are kind of in that same world we were in during junior high, with our braces, first pair of glasses, and awkward haircuts. These 'chicks' (really though, let's call them what they are, Pullets, by now) are stinky, ugly, noisy, and really good at jumping out of the big rubber-maid container I call a brooder. I'd like to say I've made it through this phase and won't look back, but let's be realistic, chickens don't have an 18 year weening period. It'll happen again.

The SketchUp version.
I'm sure it was around this time that I started to get really enthusiastically serious (I'm sure John helped motivate) about setting up a chicken coop. We couldn't get it ready fast enough! Sure, I'd been planning it using Chief Architect, and conversely John and been planning it using SketchUp, as he is prone to do. I'm pretty sure mine came out better.

My goal was to build a chicken coop very cheaply, to buy the least amount of material possible, to use our various accumulation of skills and experience to make it happen. Was I successful? I'm not sure. I've read of people who have created coops for much less than we did (I think in the end, we spent over $150). I'm not sure if this means we aren't resourceful enough, we don't hoard enough, or if it just costs more that I would expect. I guess it is what is it is. I did get to be lead carpenter, laminate guy, roofing installer, and finish carpenter on this project though. I liked that.

We had some of the 2x framing materials on hand, but still needed to buy a few sticks for the roof and nesting box, I think. The most expensive components for us were the 4 concrete footings that we used for setting the floor framing. We also needed to buy the Pressure Treated lumber used for the floor framing of the coop. We wanted the coop to be easy to clean, so we used some leftover EPDM from the pond liner for the flooring, then found a remnant of laminate from a flooring center for the wall linings. We had rigid foam insulation left over from other projects, lap cedar siding from the house, asphalt roofing, and OSB for the doors too, so all that was left was the mesh for the windows/vents.

I'm pretty happy with the way that the coop turned out in general. I think that there is plenty of space [in the coop and nesting area] for 7 chickens (we've only maxed out at 5 so far). The one thing I wish we had done differently is the enclosure/run. If I had designed the coop to sit off the ground at least 24", it would have given me an add'l 10 square feet of enclosure space = free fresh air for chickens.

First night in the new coop.
Once those chickens hit the 9 week mark, we were almost ready to house them in a new coop. I put a red light inside to help offset the winter light and promote laying... in spite of the fact that you can't expect hens to lay their first egg until around the 21st week. Chicken rearing is a good exercise in patience and stewardship.

Have you built a coop of your own? Do you aspire to? How does it turn out?

Counting your Chickens After They Hatch

In the realm of our chicken adventures, I last left off at receiving our chicks via snail-mail.

Since that day, we've had epic failures but also overall success with our flock, which led us to "expanding" it the following spring... sound a bit vague? Probably because there are too many details to cover in an introductory sentence or two.

And away we go.
When our first batch of chicks arrived I was away on a business trip (I believe this was mid-April). This was a complication for obvious reasons, but I'll cover a few of them anyway. First off, the deal between John and I was that the chickens were MY deal, MY responsibility. He didn't want to get stuck doing all the work and worrying about these creatures that I insisted on obtaining... no matter how interesting and productive they were. This was the deal when he agreed that backyard chickening would in-fact occur. I thought it was a fair deal. The guy takes care of a lot around our house, I could understand why he wouldn't want to be saddled with one more thing. Deal.

So it was ON. I placed my order for chicks, and in doing so learned that the heritage breed that I'd been dreaming of (Delawares) were fairly rare, frequently back-ordered, and often unavailable. The only available date that would ensure them to get to our house as spring chickens would be to order them for an arrival date where I would be out of town on a business trip. After many guilty feelings and apologies, I asked John to receive the chicks and was terrified that the tiny little babies would be left on our doorstep in the cold and he would come home from work to find a box of chick-cicles.

My worries were unfounded, as it turned out. Also, my appreciation for the USPS was raised 10-fold. They handled the handling of our package wonderfully and were great about notifying us when the package arrived in not only a friendly but easy manner. John was able to retrieve them without any hassle and nursed them for their first week while I was away.

I didn't get to be there to see our next package of chick opened this year either (we hosted an order for 3 households). On both occasions John has been around to receive the box, for which I am thankful, but I am still intrigued to experience that first moment when you open your long anticipated box of chicks. It might not happen for me any time soon... our coop is full up.

Now, once you have a bunch of new chicks in your house, you are faced with a very real task... how will I house them and keep them safe, healthy, and happy?

Sunday, December 4, 2011

VG Fir, call her our muse.

They, in the woodworking community, call it VG Fir. I think this is because it is a short-n-sweet descriptor, but, if you are not fortunate enough to be 'in the know', VG Fir sounds as though it must be a highly specialized and prized wood species (the rare and elusive veegee tree).

In fact, 'VG' stands for "Vertical Grain" (a.k.a. Quarter Sawn), and 'Fir' references the Douglas Fir tree (Pseudotsuga menziesii). If you have any building or DIY experience, it is likely that you will recognize Douglas Fir as one of the primary woods used for framing stock. But don't be fooled. There is a difference between most of these 2-by boards you see in your building supply store and the VG Fir boards used for fine wood working and finish trim. It all begins at the lumber mill... and ends when the boards come out the other side. Some are cut to make the most quantity from the tree (full sawn or flat sawn), others are cut to expose the wood grain in a specific way (quarter sawn). But... this is a lot of boring talk about wood that I don't want to get into. To get a fuller appreciation of the topic, read about Flat Sawn wood vs. Quarter Sawn wood. What it really comes to at the end of the day are two distinctly different looks of lumber coming from the same tree. We here on Pennsylvania consider ourselves to be slightly snobbish about the topic, and will likely scoff at any references to Full Sawn...well... anything. Go VG or go home.

So... why the rant? It takes me back to our title... VG Fir, call her our muse.

When John and I began our house hunt, we were enamored with the idea of rejuvenating something with an old soul. We'd see the houses that had been flipped and were painted head-to-toe, including the composite (MDF) wood trim. There was no sense of character or timelessness in many of the homes. Many of them looked as though they needed to be torn apart again, regardless of when their last face-lift occurred, because there was such a lack of personality to be found.

We saw the Pennsylvania house and immediately knew it was the one. First it was from the outside... the half-hip roof has a distinctly craftsman-bungalow characteristic. We scheduled a walk-through and reveled in the house's gutted glory.

There was nothing. A clean slate. The previous owner had been a drywall contractor and had made a first pass on the house. A vaulted ceiling to a 2nd floor loft, unfinished flooring, no baseboards, no window or door trim. It was our chance to define something timeless on our own.

If you are familiar at all with the Bungalow style, you'll know that it often features natural wood accents. This usually includes all of the interior trimmings, maybe a mantel, the kitchen cabinets, some built-ins and wainscoting. Often, these accents will be featured in Quarter-Sawn White Oak. If you are not familiar with the  natural resources of Northern Idaho, I can tell you that White Oak is not one of them.

No, here in the inland northwest we have acres and acres of beautiful forests. Forest full of pine trees, and fir trees, and spruce trees, and cedar trees, and birch trees, and alder trees, and maple trees. But of all trees, Douglas Fir is our go-to wood.
Douglas Fir, how do I love thee? Let me count the ways.
  1. Amber in youth, deepening glow in age, fine furniture is one of your callings.
  2. A tried and true framing and structural standard, you are relied upon as the backbones for so many homes.
  3. High BTU burning warms us to our soul, even in scrap your value is mighty.
  4. You lend beauty and stature to our forests with your fishured bark and looming majesty.
  5. You are driving force to our timber industry, keeping our forests a strong and relevant part of our lives.
Built-in bookcase
Entertainment center and
the coffee table are DF
In Northern Idaho, almost every home built in the first 1/2 of the century relied heavily on Douglas Fir (I imagine they still do). Our house is no exception. When we walked in for the first time, we saw wooden floors. Sure, they were dark with age, slivered and rough. They had been painted and covered with cheap carpeting for most of their existence. Regardless we saw wooden floors. The very first project we undertook was to patch and re-finish the floors. This was our first understanding and appreciation of VG Fir.

Since then, we've made it our business to incorporate VG Fir where ever we can. John produced beautiful VG Fir wainscotting in our foyer. Our windows and doors are trimmed with it. Our front door is VG Fir, as are the garage doors that John custom crafted. He also made an amazing built-in entertainment center using the stuff, as well as a built-in bookcase.

Contorted DF
To top off our theme, we planted Contorted Douglas Fir trees at our front entry. Our twisted introduction to a VG Fir experience. I don't imagine many, if any people know what these plants are, or what they represent or reference... but we do. We like to think about those sorts of details.

We considered making the kitchen cabinets from VG Fir, but you might be surprised to know that it is really a fairly cost-prohibitive product. We also had to wonder if we were taking this VG Fir thing a little too far. Instead, we chose to tip our hats at the classic Bungalow quarter-sawn white oak. I'm learning that Quarter-Sawn White Oak has its own set of nuances... Quarter-Sawn White Oak, how do I love thee....

Urban Chickening - I highly recommend these outdoor pests


I came down with chicken fever in the fall of 2009. I don't remember exactly what prompted the obsession (I think it was my disdain for mental images of all of those commercial layers being crammed in tiny coops w/ not hope for daylight and fresh air) but I remember lots of speculation about where a chicken coop would work in our backyard. There was a lot of researching of breeds, and even more chicken coop designing.

It wasn't until last winter, after much wavering, that the decision was made. Forget about the added responsibility, the expense, and the addition of one more project that would require completing. I had to have CHICKENS!

For the first 20 1/2 weeks, I must admit that I regretted the decision immensely. Let's see... I suppose I should begin at the beginning.

I started by trying to convince every one else I knew to get chickens before I did. This plan didn't work so well. I decided that I was just going to do it, then thought about that fact that we already have a ton of loose threads in our lives. Unfinished house projects, unkempt gardens, craft projects 1/2 finished, and who knows what else were adding unnecessary stress to our lives, why would I be so foolish to add 1 more? Chickens require a coop, an enclosure, time, and attention. Firm NO. Nope, I've learned my lessons, I'm NOT going to get chickens. Plus, I thought we were on the verge of getting a friend who lives nearby to make the leap... I would be able to learn about chickens vicariously... but then a terrifying thing happened, they were considering not doing it either! Dear lordy... what about the chickens?!

So, in a snap decision, I changed my mind. We were going to make this happen. I'm glad to report that our friends did too.

I re-researched and found my top-two chicken breeds. I wanted birds that were dual purpose meat birds and layers (in case we decided we weren't chicken farmers after all, and we wanted to make soup instead). I also wanted birds that were known to be quite, gentle, and able to be kept in a small space during days while we were at work. They needed to be cold-hardy, and on top of it all lay as many eggs as chickenly possible. I also knew that there are many chicken breeds on the verge of being lost forever to commercial breeds.

Cindy-Lou, the Deleware
I found websites to research the different endangered heritage breeds and settled on Delewares and Speckled Sussex as my top choices. I became a frequenter of the website BackyardChickens.com, and used their breed index to settle on my choices. They offer quite a lot of useful guides about breed characteristics with their breed index. This site was also invaluable for step-by-step chick rearing, and chicken coop design ideas.

Tinkerbell (a.k.a. "Toeless") a
Speckled Sussex, in the foreground.
I ordered my chicks from MyPetChicken.com, who ships baby chicks in the mail. The idea of this was hard for me to conceive and caused great anxiety. What if another package was place atop my chicks and they were crushed? What if they get turned upside down and sideways and tumbled in their box? Its still cold in April, what if they freeze? Adding to the concern was that fact that I had to leave town for business the day before they were to arrive. With John at work all day, how would the chicks be rescued from their cardboard prison?!

Fortunately, all of my concerns were for naught. John was able to be there when the delivery came, and the all 5 chicks were peeping and relatively happy.

Next up... coping with baby chicks. When is it cute that your dogs show interests in chickens? Do backyard chickens actually lay eggs? And other trials and tribulations...

Don't be wooed into thinking a Kitchen Remodel will be easy...

...or fast. Because it won't be, at least not in my experience.

You do, however have to keep in mind the source of this advice. For our kitchen remodel we opted to do all of the work ourselves. This wasn't just a replace-or-paint-what-is-there sort of project. No, we don't make such practical or manageable decisions. This was a gut-everything-move-structural-walls-electrical-plumbing-expose-the-wall-and-floor-framing-then-craft-beautiful-wood-cabinets-and-insanely-time-consuming-concrete-counters sort of project.

Here's the breakdown, plus some tips for your version of this project. Hindsight really is 20/20:
This is pretty close to what the kitchen in our house looked like when we moved in. We added the SS Fridge and DW. The floors were unfinished DF for a long time... I'd gotten many splinters here. ADVICE: Every household MUST have at least one reliable pair of tweezers; don't be afraid to handle your partners' feet, it is likely that their hands and minds have been working hard for you all day.
Phase 1, Demolition: Here are our first destructive measures. Adding a bigger window. Notice the phone nook and beam in the Living Room... those are important later on. ADVICE: Clean your dishes and put your crap away before you start demolition... and before you take a bunch of photos you may one day share publicly with the virtual world.
Major destruction... fun stuff to live in. I think we were probably eating at Moon Time a lot during this phase... or maybe just lots and lots of soda crackers. ADVICE: Budget for lifestyle changes in addition to materials. It is worthwhile to pay yourself somehow when you are permanently temporarily inconvenienced during a gut job.
Here's the beginning of Phase 2, Structural. The wall finish, ceiling finish, and dorky phone nook are going away. ADVICE: Familiarize yourself with your favorite garbage disposal methods. Big chunks of drywall are a mess to fit into a street pick-up garbage can.
I think we worked on this around Christmas (wink), demolition complete. ADVICE: Never use the word "complete" unless where it is prefixed with "almost" or the like.
So, to place the beams, we had to add support in our basement, per the floor opened up for this purpose. I think we lived w/ a gaping hole in our kitchen floor for 2-3  weeks. ADVICE: Watch your step.
Remember that beam? It just grew 14'. We were able to gain 2' from our bathroom to add to the kitchen. You can see the brace wall holding up the 2nd floor and roof while we move this beam into place. Merry Christmas! ADVICE: Learn the basics of bracing. Bracing concepts are your friends... and nearly timeless ones at that.
Have I ever mentioned my father is an AWESOME metal worker? Here is some of his work in its early stages. These pieces really help define the character of our house. Shout OUT. ADVICE: If you have an amazingly skilled and gifted crafts-person in your life, include their art in your projects. Shout their amazing virtues to the world. How else will any other person know of them? Even if your voice is not loud enough, their impact on your vision is invaluable... cherish it. (I'd love to see your visionaries! Link to them in the comments.)
Phase 3, Layout: Here's the empty kitchen w/ new cork floor. Love the cork, it hides most indiscretions. ADVICE: Mopping the floor is for people who don't have enough other projects looming. Start more projects if you ever consider mopping your floor.
This really shows the new space. The fridge takes up about the same space that the old phone nook did. The gap between the post and the blue wall used to be part of the bathroom. Good reference of scale of the kitchen then and now. New windows that open too... Woot!
Phase 4, Hibernation: We lived with the kitchen in this state for at least 3 yrs (sans new cabinet boxes). You can see in the foreground the new cabinet boxes that will fill the space. Also, the range is missing here, but you can see the plastic on the left where it once sat... ADVICE: Avoid Phase 4.
Phase 5, Revitalization: Ah! Boxes in place! ADVICE: Patience is important when the person with skill  is the person doing the work. Remind yourself that you are only one or two rungs above spectator (being part of the peanut gallery doesn't help anyone). Beer helps, so do diagrams of the final cabinet layout. Keep both handy.
Phase 6, Face Frames: The cabinet face frame and doors are Quarter Sawn White Oak. This is the stuff you would traditionally see in Arts & Crafts furniture with the groovy figuring. Kinda looks like tiger stripes, but a little more subtle. ADVICE: Appreciate and celebrate the details as they emerge; the hint of your final result, no matter how small, is the best motivation to see your project through.
Even though the cabinets were in place once, it was only a rough fit. The boxes had to be removed then the face frames attached and then put back into place. ADVICE: Patience is important when the person with skill  is the person doing the work. Remind yourself that you are only one or two rungs above spectator. Beer helps.
This is the longest bank of cabinets, measuring over 11' in total. You can begin to see my appreciation for JG. I think she helped move this in and out of place at least 3 times while I was in my comfortable air-conditioned office. The price you pay for good work... John did an awesome job making sure it looks great! ADVICE: Make friends who are happy to lift heavy things once or twice. Make lots of friends like these... generally you can only sucker them into helping you once or twice. There are often more than one or two heavy things.
Phase 7, Functional: Skipping ahead a bit, here is the view from the foyer! Pretty awesome, eh? The kitchen is functional here, complete with sink, oven, cooktop, and dishwasher. ADVICE: Embrace functional. It works.
Here's another of the bar. It looks like a piece of furniture. What you can't see are the lack of doors and drawers. We lived with cavities for at least a year, but still enjoyed better storage than we ever had before. ADVICE: Don't put off going to the dentist.
Phase 8, Counters: Concrete counters. I think they are glorious. This shows the built in drain-board. ADVICE: If you ever want to punish yourself once it is time to grind smooth your concrete counters, include a built in drain-board. We love ours.
Here is the walnut butcher block we added as a spacer between concrete slabs. It actually served an important purpose in not requiring us to seam two of the concrete pieces, and in breaking up the long counter span. Oh, and we can cut food-stuff up on it too. ADVICE: When you are creating ridiculously work-intensive surfaces, you may as well mix it up. It would be boring to stick with only one medium.
We also added a walnut slab over the bar area to tie the two materials together... maybe one day I'll write blog entries about these, and also about the concrete counter process. ADVICE: Document your projects during hibernation, it is difficult to remember details years later when you are left to just make stuff up out of desperation.
Phase 9, Backsplash: We agonized for too long over the tile to use for the backsplash. I wanted something safe, like white; John wanted some thing bold. We settled on this grey-green color. What is funny/weird is that if you hold this tile up to my living room walls, bathroom tile, exterior siding, living room chairs, or dining room accent color, you will see they are perfect color matches. Safe or bold, my ear. The heart wants what it wants. Apparently mine wants Carrington BeigeADVICE: Listen to your heart. Cheesy? Yes.

Good Luck!

Deck, Deck, Chicken

Our backyard has an ever-changing landscape. And I don't just mean the seasons. It has gone through many transformations...most of those for utilitarian purposes. I think overall, we've made changes for the better, but holy-moly, has it taken a long time!

Let's see, we moved into the house in December of 2002. Due to the frigid north-Idaho winter temperatures, we didn't focus too much on the backyard (or front yard for that matter) until months later. I'm not sure we even bothered to go back there... it seems like a distant memory.

Here are some of the things I do remember. I do remember a backdoor off the kitchen that went to a "screen-porch" (i.e. un-insulated catch-all room), which had another door to a back stoop. There were concrete steps from that door to a concrete pad. This back-patio area was a slab that sloped toward the house, so with any amount of rain we had puddles of moisture right against the foundation. There was a lean-to roof covering most of the slab. It was made of that green corrugated translucent roofing stuff, and was covered in mildew + 1 dead parakeet.

I also remember that there was no fence worth mentioning... okay it was worth mentioning for the sake of reminiscing. I think there was a scattering of metal fence posts driven in a "row" between our house and the neighbor's with some welded wire fencing strung across. I feel like this acted more like a deterring wad, than any sort of a real barrier. I'm not certain who erected the structure, but thankfully our neighbors were also relatively new to the 'hood, young, and eager to improve... so a nice cedar fence was in our future.

Along the back edge of the yard were 6 or so Spruce Trees. The must have been fairly old, I think that they each were at least 20" in diameter. It wasn't much of a life for those trees, they'd all been topped numerous times for the sake of the electrical lines running 20' overhead. Each tree looked mangled and angry and were weeping pitch and needles and blocking all of the sunlight possible, as though they needed to share their misfortune with whom ever resided inside.

One of our biggest focuses (i.e. obsessions) that winter was to get a dog the next spring. Every person in the neighborhood we spoke with told us horror stories of Parvo and how all of the dogs who lived in that back yard got sick. This was terrifying for us, mostly because we had also learned that the deadly-to-puppies disease lives in the soil and exposure to sunlight is one of the only ways to rid it of your premises, something sorely lacking in our back yard.

So... first order of business as the first leaves began to emerge: dogify the back yard. This included the new fence and the removal of those mean, mean spruce trees, thusly scorching parvo forever from our earth.

Fortunately for this project, the spruce trees were trying to stretch their arms back up into the electrical lines. John called in the artillery by contacting the power company about limb removal. It turns out that the fellows on the limbing crew that day were of a very generous nature. They limbed the spruces all the way to the ground, and that was that.


Additional modifications promptly included a doghouse and a dog. Both of the built-in variety. Simon was an irresistible find from Northwest Seed and Pet, a cool pet and garden establishment nearby. Maggi came that fall, an adoption through a local group that posted her litter on PetFinder.com.

We continued expansion with a raised bed built during a rainstorm, a brick patio in the herringbone pattern, two huge mounds of dirt, a koi pond, a deck, a tool shed, and most recently a chicken coop. Each of these projects deserve a small bit of spotlight of their own... so that might need to be for another day.

Some features were modified to suit our needs as they developed, but I really think that we are on our way to being finished back there, maybe only 1 or 2 more seasons... that is, until I decide to jump on my long growing (since 2006) obsession with honeybees...